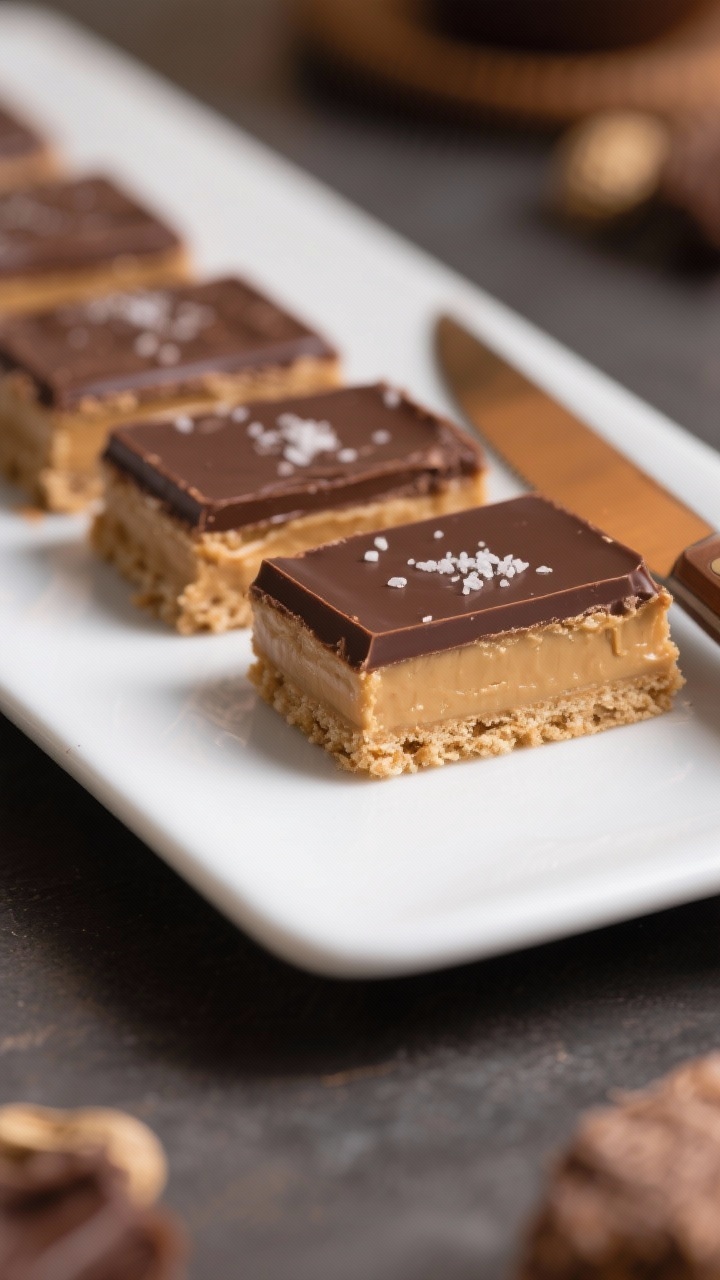
No-bake peanut butter bars are the kind of treat you keep in your back pocket for busy days, potlucks, and last-minute dessert cravings. They come together fast with pantry staples, set in the fridge, and slice beautifully into rich, peanutty squares. The texture is creamy with a gentle crunch, and the chocolate topping seals the deal.
Whether you’re feeding kids, coworkers, or just yourself, these bars rarely last more than a day. They taste like a peanut butter cup, but they’re easier, bigger, and a whole lot more comforting.
What Makes This Recipe So Good
- Zero baking required: The fridge does the work, making this perfect for warm days or quick prep.
- Classic flavor combo: Peanut butter and chocolate never fail, and the buttery graham cracker base adds the right crunch.
- Foolproof texture: Soft and creamy base with a firm chocolate layer that snaps just enough.
- Customizable: Swap sweeteners, use different nut butters, or add mix-ins without fuss.
- Great for making ahead: They store well in the fridge or freezer, so you can slice as needed.
What You’ll Need
- 1 cup (225 g) unsalted butter, melted
- 2 cups (500 g) creamy peanut butter (no-stir variety works best)
- 2 cups (240 g) powdered sugar, sifted if lumpy
- 2 cups (200 g) graham cracker crumbs (about 14 full sheets), finely crushed
- 1 teaspoon vanilla extract
- 1/4 teaspoon kosher salt (skip if using salted butter)
- 2 cups (340 g) semi-sweet chocolate chips or chopped chocolate
- 2 tablespoons peanut butter (for the chocolate topping)
- Flaky sea salt (optional), for finishing
Instructions
- Prep the pan: Line a 9×13-inch baking pan with parchment, leaving overhang on two sides for easy lifting. Lightly grease the parchment.
- Make the peanut butter base: In a large bowl, stir together melted butter, peanut butter, powdered sugar, graham cracker crumbs, vanilla, and salt.
Mix until smooth and evenly combined.
- Press it in: Transfer the mixture to the pan and press into an even layer. Use the bottom of a measuring cup to smooth the surface.
- Melt the chocolate: In a microwave-safe bowl, combine chocolate chips and 2 tablespoons peanut butter. Heat in 20–30 second bursts, stirring between each, until silky and fully melted.
Alternatively, use a double boiler.
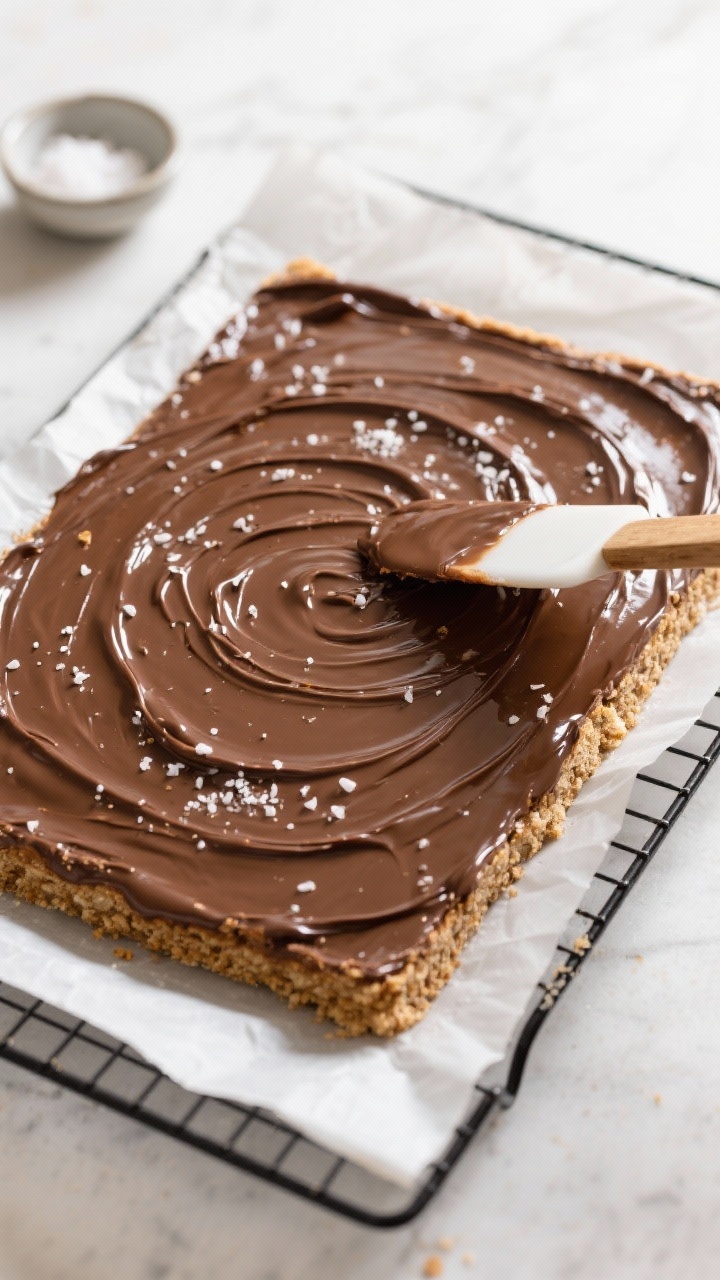
- Top and smooth: Pour the melted chocolate over the base and spread evenly with an offset spatula. Tap the pan gently to release air bubbles.
- Chill: Refrigerate for 1.5 to 2 hours, or until the chocolate is set and the base is firm.
- Slice smart: Lift the slab out using the parchment. For clean cuts, let it sit at room temperature for 5–10 minutes, then score the chocolate with a sharp knife and slice into bars or squares.
- Finish (optional): Sprinkle flaky sea salt on top just before the chocolate fully sets for a sweet-salty pop.
Keeping It Fresh
- Room temperature (short-term): Keep in an airtight container for up to 2 days if your kitchen is cool.
The chocolate may soften in warm rooms.
- Refrigerator: Store in a sealed container for 1 week. Place parchment between layers to prevent sticking.
- Freezer: Freeze for up to 2 months. Wrap the slab or individual bars tightly and thaw in the fridge overnight or at room temp for 20–30 minutes.
Benefits of This Recipe
- Minimal effort, big payoff: You get a bakery-worthy dessert with basic mixing and no oven.
- Budget-friendly: All ingredients are common and affordable, especially for a crowd.
- Perfect for entertaining: Easy to transport, slice, and serve at parties, potlucks, or bake sales.
- Make-ahead convenience: You can prepare days in advance without sacrificing taste or texture.
- Kid-approved: Familiar flavors and simple sweetness make these a hit with all ages.
Pitfalls to Watch Out For
- Using natural, runny peanut butter: This can make the base too soft or oily.
If using, add extra crumbs and chill longer.
- Overheating the chocolate: Burnt or seized chocolate turns grainy. Melt gently and stir often.
- Cutting while too cold: The chocolate topping can crack. Let the slab warm slightly and score before slicing.
- Skimping on crumbs: The base needs structure.
Measure graham crumbs accurately for the right firmness.
- Forgetting the salt: A pinch brightens the flavor and balances sweetness.
Alternatives
- Nut butter swaps: Almond butter or cashew butter work well. For a nut-free version, use sunflower seed butter and adjust crumbs if mixture seems loose.
- Sweetener tweaks: Replace powdered sugar with a blend of powdered sugar and finely ground coconut sugar. Avoid liquid sweeteners, which can make the base sticky.
- Crumb variations: Try digestive biscuits, vanilla wafers, or gluten-free graham crackers.
For extra texture, mix in crisped rice cereal.
- Chocolate choices: Use milk chocolate for a sweeter bite, or dark chocolate (60–70%) for a richer finish. White chocolate works if balanced with a sprinkle of salt.
- Add-ins: Fold mini chocolate chips, chopped peanuts, or shredded coconut into the base. A swirl of caramel or a drizzle of melted peanut butter over the top looks great.
FAQ
Can I make these without graham crackers?
Yes.
Digestive biscuits, vanilla wafers, or shortbread cookies will work. Just keep the crumb volume the same and crush them finely to maintain the base structure.
How do I prevent the chocolate layer from separating?
Press the base firmly and spread the chocolate while the base is cool but not rock hard. Adding a tablespoon or two of peanut butter to the chocolate also helps it adhere.
What if I only have natural peanut butter?
Stir it very well to reincorporate the oil.
Start with the listed amounts, then add 1/4–1/2 cup extra graham crumbs if the mixture looks soft. Chill a bit longer before topping with chocolate.
Can I halve the recipe?
Absolutely. Use an 8×8- or 9×9-inch pan and reduce chilling time slightly.
Keep ingredient ratios the same.
How do I get clean, neat slices?
Let the bars sit at room temp for a few minutes, then score the chocolate lightly before pressing the knife through. Wipe the knife with a warm, damp cloth between cuts.
Are these gluten-free?
They can be. Use certified gluten-free graham crackers or another gluten-free cookie crumb, and double-check that your chocolate and peanut butter are gluten-free.
Can I reduce the sweetness?
Yes.
Cut the powdered sugar by 1/4–1/2 cup and use darker chocolate. Keep in mind that less sugar may slightly soften the base, so add a bit more crumbs if needed.
Do they need to stay refrigerated?
They hold best when chilled, especially in warm weather. For serving, leaving them out for up to 2 hours is fine, but return leftovers to the fridge.
Wrapping Up
These no-bake peanut butter bars deliver everything you want in a simple dessert: quick prep, familiar flavors, and a texture that hits the sweet spot between creamy and firm.
They’re easy to customize, easy to store, and easy to love. Keep the ingredients on hand, and you’ll always be a couple of steps away from a dessert that makes everyone smile.