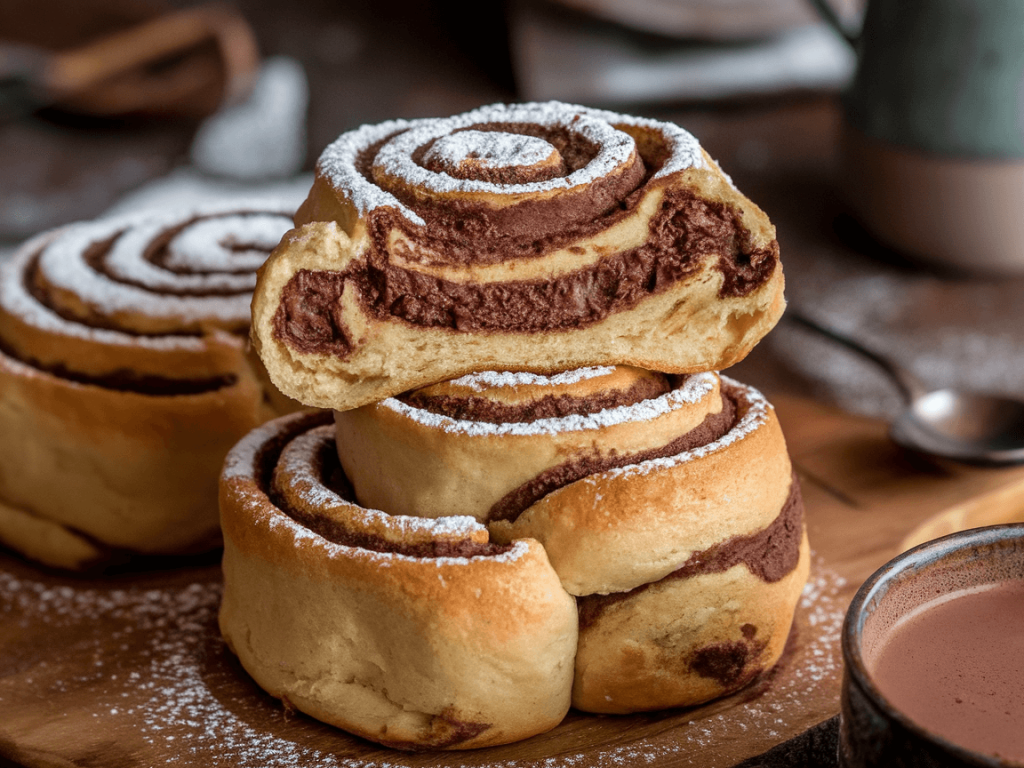
Can we talk about cozy mornings for a second? You know the ones—blanket wrapped around you, a steaming mug in hand, and the smell of something sweet filling the room. Now imagine if that sweet thing wasn’t just your hot cocoa but also a cinnamon roll infused with chocolatey goodness. Yep, I’m talking about Hot Cocoa Cinnamon Rolls. They’re soft, gooey, decadent, and basically breakfast and dessert rolled into one (pun intended).
I’ve tried a lot of cinnamon roll recipes, some great, some…well, let’s just say “learning experiences.” But when I combined my favorite hot cocoa flavors with the classic cinnamon-sugar goodness, everything changed. Today, I’m sharing my step-by-step recipe that’ll make your mornings feel like a warm hug with a side of chocolate.

Why Hot Cocoa Cinnamon Rolls Are a Must-Try
Let’s be real—why settle for ordinary cinnamon rolls when you can make them chocolatey, gooey, and slightly indulgent? Here’s why these rolls deserve a spot in your recipe box:
- Ultimate Comfort Food – cinnamon + chocolate = happiness in carb form.
- Easy to Make at Home – no fancy bakery skills required.
- Perfect for Cozy Mornings – pairs perfectly with coffee, tea, or yes, a hot cocoa.
- Customizable – add nuts, marshmallows, or even a drizzle of caramel if you’re feeling fancy.
Ever wondered why bakeries can charge so much for rolls? FYI, it’s mostly about presentation and hype. Homemade versions? Just as tasty, usually cheaper, and way more satisfying.
Ingredients You’ll Need
No obscure ingredients here. Most of this stuff is probably in your pantry already.
For the Dough:
- 1 cup warm milk (110°F / 43°C)
- 2 ¼ tsp active dry yeast (1 packet)
- ¼ cup granulated sugar
- ⅓ cup unsalted butter, melted
- 1 tsp salt
- 2 large eggs
- 4 cups all-purpose flour
For the Hot Cocoa Filling:
- ½ cup unsweetened cocoa powder
- 1 cup brown sugar, packed
- ¼ cup unsalted butter, softened
- ½ tsp salt
For the Glaze:
- 1 cup powdered sugar
- 2-3 tbsp milk or cream
- ½ tsp vanilla extract
- Optional: mini chocolate chips for extra decadence
Pro tip: don’t skimp on the butter—it’s literally the glue that makes these rolls decadent and gooey.
Step-by-Step Instructions
Making cinnamon rolls might sound intimidating, but I promise, it’s easier than you think.
Step 1: Activate the Yeast
- Warm your milk until it feels cozy, not hot enough to scald your fingers.
- Sprinkle yeast and a pinch of sugar over the milk. Let it sit 5-10 minutes until it foams.
Ever wondered why yeast foams? It’s proof it’s alive and ready to make your rolls fluffy. Skip this, and you might end up with sad, dense rolls—no one wants that.
Step 2: Make the Dough
- Mix melted butter, sugar, salt, and eggs into the yeast mixture.
- Gradually add flour until a soft dough forms.
I like to mix by hand; gives me a chance to really feel the dough, plus it’s oddly therapeutic.
Step 3: Knead and Rise
- Knead the dough for 5-7 minutes until smooth.
- Place in a greased bowl, cover, and let it rise 1-2 hours or until doubled.
Pro tip: cover with a slightly damp towel to prevent drying out. Trust me, fluffy rolls > crusty disappointment.
Step 4: Prepare the Filling
- Mix cocoa powder, brown sugar, softened butter, and salt until smooth.
- Taste it—yes, licking the spatula is allowed.
This filling is basically liquid chocolate dreams. Don’t say I didn’t warn you.
Step 5: Roll and Fill
- Punch down the risen dough and roll it into a rectangle, about 16×12 inches.
- Spread the chocolate-cinnamon filling evenly over the dough.
Here’s where you can get creative—add mini marshmallows, chocolate chips, or even a drizzle of caramel. Ever wondered why bakeries make so many toppings? Simple: people love choices.
Step 6: Roll and Slice
- Roll the dough tightly from the long edge into a log.
- Slice into 12 equal rolls. Floss works wonders for a clean cut without squishing.
IMO, using floss is a total game-changer. Knife cuts are messy and sad.
Step 7: Second Rise
- Place rolls in a greased baking dish, leaving a little room to expand.
- Cover and let rise 30-45 minutes.
The second rise is non-negotiable. Without it, your rolls will be chewy instead of soft and pillow-like.
Step 8: Bake
- Preheat oven to 350°F (175°C).
- Bake for 20-25 minutes until golden brown.
FYI, ovens vary. Keep an eye on them—golden brown is perfection, dark brown is “oops, a bit too enthusiastic.”
Step 9: Glaze and Serve
- Mix powdered sugar, milk, and vanilla until smooth.
- Drizzle over warm rolls. Optional: sprinkle mini chocolate chips on top for extra decadence.
Ever noticed how warm glaze melts into the nooks and crannies? That’s the melt-in-your-mouth magic right there.

Tips for Perfect Hot Cocoa Cinnamon Rolls
- Warm milk – yeast loves a cozy environment.
- Don’t overmix flour – keeps the rolls soft.
- Butter generously – no skimping, this is the gooey factor.
- Second rise – essential for that fluffy texture.
- Serve warm – leftover rolls? Microwave for 10-15 seconds for soft perfection.
Fun Variations to Try
Want to mix it up? Cinnamon rolls are a blank canvas:
1. Marshmallow Hot Cocoa Rolls
- Add mini marshmallows into the filling.
- Top with extra marshmallows and chocolate drizzle.
IMO, this one is basically campfire hot cocoa in pastry form.
2. Nutty Cocoa Rolls
- Mix chopped pecans or walnuts into the filling.
- Adds crunch and a nutty depth to your sweet rolls.
3. Mocha Cinnamon Rolls
- Add a teaspoon of instant coffee granules to the cocoa filling.
- Coffee + chocolate = sophisticated yet comforting.
4. Caramel Cocoa Rolls
- Drizzle caramel over the glaze or filling.
- A gooey, sweet surprise in every bite.
Ever wondered why bakery rolls taste “fancy”? Most of the time, it’s toppings and presentation. DIY? Way tastier and cheaper.
Common Mistakes to Avoid
Even cinnamon roll pros have bad days. Here’s what to watch out for:
- Skipping yeast proofing – rolls won’t rise properly.
- Overfilling with sugar – gooey is good, lava is messy.
- No second rise – chewy instead of fluffy.
- Baking too long – aim for golden brown, not dark.
Once you avoid these mistakes, your rolls will be Instagram-worthy and melt-in-your-mouth amazing.
Serving Suggestions
- Breakfast – with coffee, tea, or yes, more hot cocoa.
- Brunch – pair with fruit or whipped cream.
- Dessert – vanilla ice cream on top? Yes, please.
- Snack – honestly, these rolls are perfect anytime.
FYI, cinnamon rolls do not judge if you eat three in a row. I speak from experience.
Why Homemade Hot Cocoa Cinnamon Rolls Are Worth It
Let’s be real: the smell alone is enough to justify the effort. But beyond that:
- Control sweetness and chocolate – make it exactly how you like.
- Impress friends and family – looks fancy, tastes amazing.
- Therapeutic – kneading and rolling is oddly satisfying.
IMO, homemade rolls are basically a warm hug you can eat.
Leftover Tips
- Microwave – 10-15 seconds to revive softness.
- Freeze unbaked rolls – bake fresh rolls anytime.
- Store baked rolls – airtight container for 2 days at room temp, fridge for up to a week.
Seriously, these rolls are forgiving if you handle them gently.
Conclusion
So there you have it: Hot Cocoa Cinnamon Rolls that are soft, gooey, decadent, and perfect for cozy mornings. From mixing the dough to drizzling the chocolatey glaze, every step is designed for comfort and indulgence. Whether you stick with classic cocoa filling or experiment with marshmallows, nuts, or caramel, these rolls will elevate your morning game.
Next time you want a warm, comforting treat, give this recipe a try. FYI, your house will smell amazing, and your friends/family will probably beg you for the recipe :).
Hot cocoa + cinnamon rolls = happiness, period. Don’t overthink it—just bake and enjoy the decadence, gooeyness, and cozy vibes in every bite.