Let’s be honest—sometimes a giant birthday cake feels overwhelming. You know what I mean: too much frosting, slicing drama, and leftovers that haunt you for days. Enter cute mini cakes, the absolute heroes of birthday desserts. They’re adorable, perfectly portioned, and ridiculously fun to make.
I remember the first time I tried making mini cakes—I was aiming for Instagram-worthy cuteness and ended up with a frosting explosion on my kitchen counter. But, after a few tweaks (and maybe a little chocolate bribe), I nailed it. Now, these little cakes are my go-to for birthdays, celebrations, and even casual “treat yourself” moments.
If you want to wow your guests, skip the cake-slicing chaos, and add some playful charm to your table, mini cakes are the way to go. Let me walk you through everything you need to know—from ingredients and tips to cute decorating ideas that even a beginner can nail.
Why Mini Cakes Are the Perfect Birthday Treat
Mini cakes aren’t just cute—they’re practical and totally fun. Here’s why I love them:
Portion Control, But Make It Fun
Ever cut a slice of cake only to realize it’s huge and way more than you can handle? Mini cakes solve that. Each person gets their own cake, so no awkward sharing moments or guilt about eating a third slice.
Creative Decorating Playground
Mini cakes are tiny canvases. You can go full-on whimsical or minimalist chic. Personally, I like to try new frosting techniques on mini cakes—it’s low-risk, and even if it looks a little messy, it’s charming.
Faster Baking, Less Stress
A large layered cake takes forever, but mini cakes bake quickly. Plus, they cool faster, so you can get to the fun part—frosting and decorating—sooner.
Essential Ingredients for Mini Cakes
Mini cakes are surprisingly simple, and most ingredients are pantry staples. Here’s what you’ll need:
Cake Base
- 1 ½ cups all-purpose flour
- 1 ½ teaspoons baking powder
- ½ teaspoon salt
- ½ cup unsalted butter, softened
- 1 cup granulated sugar
- 2 large eggs
- 2 teaspoons vanilla extract
- ½ cup milk
This is a classic vanilla base. It’s soft, fluffy, and pairs beautifully with almost any frosting. You can also swap in chocolate or red velvet for variety.
Frosting Ideas
- Buttercream frosting (classic, smooth, and easy to tint with food coloring)
- Cream cheese frosting (perfect for tangy-sweet flavor)
- Whipped ganache (for chocolate lovers)
Decorations
- Sprinkles, edible glitter, or sugar pearls
- Mini fondant shapes (stars, hearts, flowers)
- Fresh berries or fruit slices
I like using a combination of sprinkles and fondant shapes. Easy, quick, and cute.
Step-By-Step Guide to Making Mini Cakes
Let’s break it down so even a beginner can pull it off without drama.
Step 1: Prep Your Pans
You can use mini cake pans, muffin tins, or even ramekins. Lightly grease or line with parchment. FYI, I’ve used muffin tins when I ran out of mini cake pans, and it worked perfectly.
Step 2: Make the Cake Batter
- Whisk together flour, baking powder, and salt.
- Cream butter and sugar until fluffy.
- Beat in eggs one at a time, then add vanilla extract.
- Gradually mix in dry ingredients alternating with milk until smooth.
Pro Tip: Don’t overmix the batter. Overmixing = dense cakes. We want fluffy, tender mini cakes here!
Step 3: Fill Your Pans
Fill pans ¾ full. Mini cakes rise quickly, so you don’t want batter spilling over.
Step 4: Bake
- Temperature: 350°F (175°C)
- Time: 15–20 minutes (check at 12 minutes for muffin tins)
Test with a toothpick—it should come out clean or with a few crumbs.
Step 5: Cool Completely
Let the cakes cool completely before frosting. I know, waiting is hard, but trust me—frosting warm cakes is messy business.
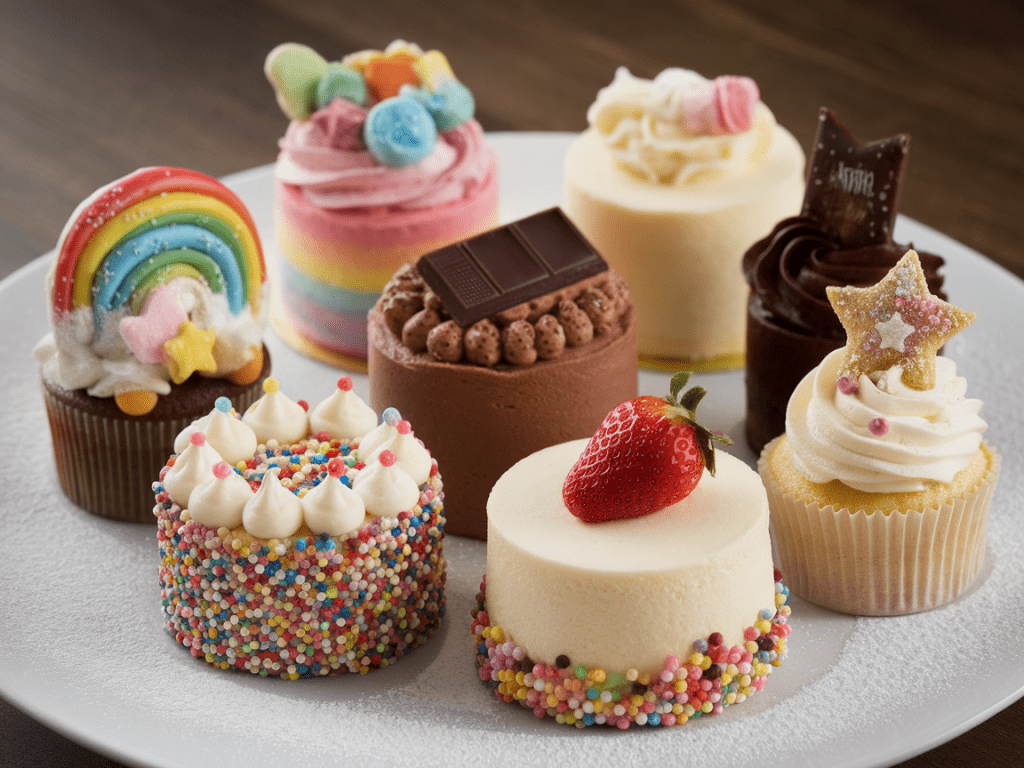
Fun and Easy Decorating Ideas
Here’s where mini cakes really shine. Small canvas = big creativity!
Classic Buttercream Swirl
Use a piping bag with a star tip to create adorable swirls. Top with sprinkles or edible glitter for instant charm.
Fruit Toppers
Add a raspberry, blueberry, or slice of strawberry on top of each mini cake. It looks gorgeous and tastes fresh.
Fondant Fun
Cut out small shapes like stars, hearts, or flowers. Place them gently on top for a polished, playful look.
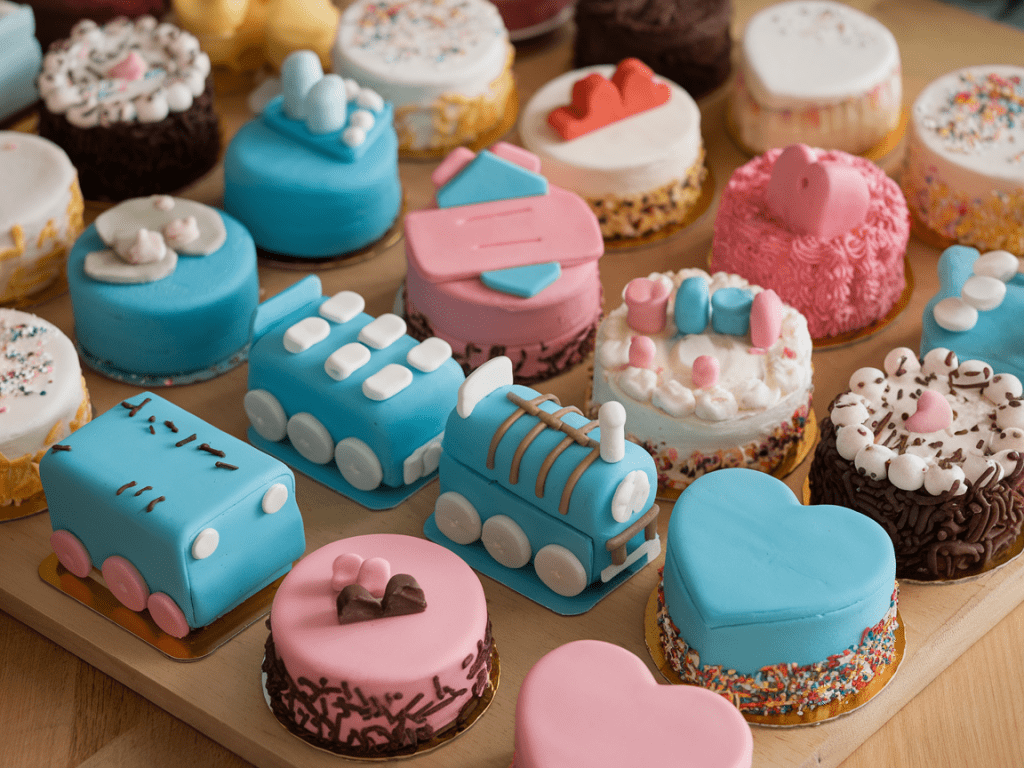
Theme Cakes
- Animal faces: Use frosting, chocolate chips, and candies for ears and eyes.
- Rainbow cakes: Stack mini cakes with different colored layers inside for a surprise cut.
- Unicorns: Frost with pastel swirls and add a fondant horn—yes, they’re as magical as they sound.
Ever wondered why mini cakes look so cute? It’s all about proportion. Small size = instantly charming.
Tips for Perfect Mini Cakes Every Time
- Don’t overfill the pans: They rise quickly, and batter overflow = stress.
- Level cakes before frosting: If the top domes, slice it flat for neat frosting.
- Chill before decorating: Cold cakes handle frosting better and reduce crumbs.
- Use a turntable if possible: Makes piping and decorating way easier.
Mini Cake Flavors You Can Try
Variety is the spice of life. Here are some crowd-pleasers:
Chocolate Lover’s Dream
- Chocolate cake base
- Chocolate ganache frosting
- Mini chocolate chips on top
Fruity Fun
- Vanilla cake base
- Whipped cream frosting
- Fresh berries or citrus zest topping
Caramel Craze
- Butter cake base
- Salted caramel frosting
- Sprinkle of sea salt on top
Peanut Butter & Chocolate
- Chocolate cake base
- Peanut butter frosting
- Drizzle chocolate on top
Pro Tip: Mix and match layers! Mini cakes are small, so you can try different combos without committing to a whole cake.
Common Mini Cake Mistakes and How to Avoid Them
Even experienced bakers stumble sometimes. Here’s how to avoid common pitfalls:
- Dense cakes: Don’t overmix batter and make sure your baking powder is fresh.
- Soggy bottoms: Use parchment or lightly grease pans, and don’t overcrowd your oven.
- Crumbly frosting: Chill cakes first, and use a crumb coat if needed.
- Falling decorations: Fondant shapes stick better on slightly tacky frosting.
Storage and Serving Tips
Mini cakes are perfect for prepping ahead.
- Room temperature: 2 days in an airtight container.
- Refrigeration: Up to a week. Chill cakes with frosting for stability.
- Freezing: Wrap individually, freeze up to 2 months. Thaw in fridge before serving.
Serving tip: Present them on a cute platter or tiered stand. They look festive and are easy for guests to grab.
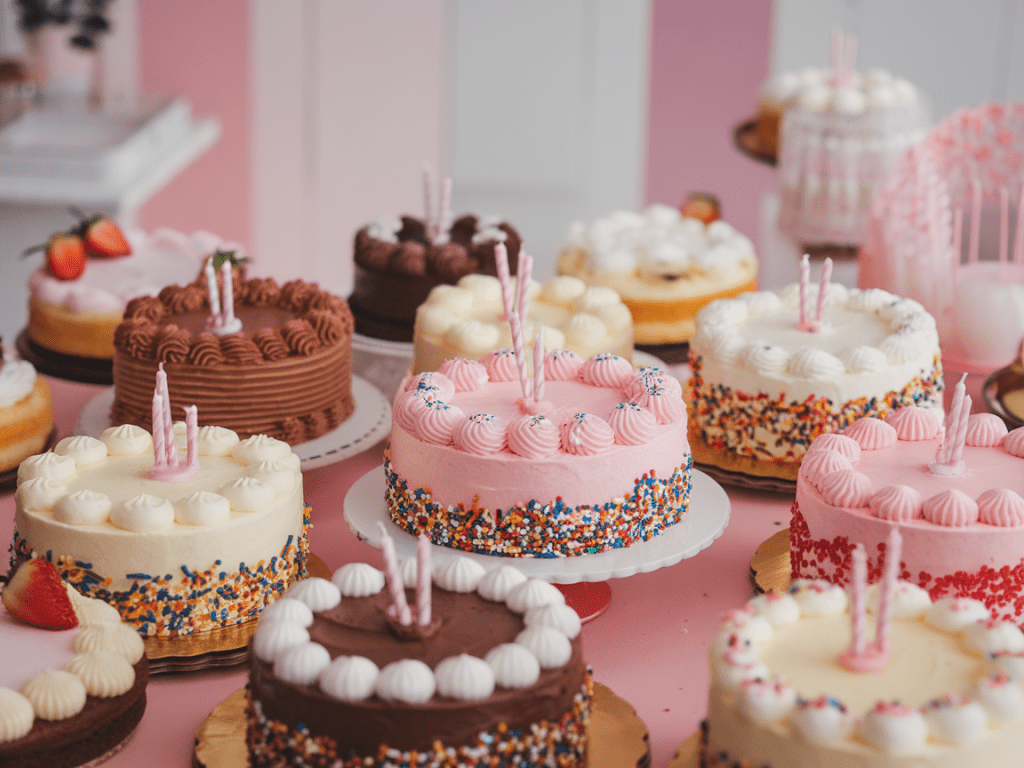
Why Mini Cakes Are Perfect for Birthdays
- Adorable presentation: Instantly Instagram-worthy.
- Personal portions: Everyone gets their own, so no fighting over the last slice.
- Creative freedom: Small size = low risk, high fun factor.
- Stress-free baking: Faster and simpler than a full-sized cake.
I’ve hosted birthday parties with mini cakes multiple times, and they’re always the star of the table. People love the personal touch, and it makes birthdays feel extra special.
Final Thoughts
Cute mini cakes for birthdays are more than just desserts—they’re tiny bursts of joy, color, and flavor. They combine ease, creativity, and charm in a way that large cakes just can’t. Whether you’re a beginner baker or a pro looking to impress, mini cakes are your ticket to adorable, fun, and easy-to-make treats.
So, grab your mini cake pans, whip up your favorite batter, and have fun decorating. Your friends, family, and Instagram followers will thank you. And honestly, who wouldn’t want their own personal cake? 🙂