You love pizza. You want more protein. You don’t want gluten drama. Cool—this chickpea pizza crust checks every box and still tastes like a legit pie. We’ll keep it simple, crispy, and totally customizable, so you can go from “I should cook” to “Wow, I made this” in under an hour.
Why Chickpea Crust Is Worth Your Time
You get pizza night without the wheat hangover. Chickpea flour packs serious nutrition with a mild nutty flavor that plays nice with toppings. Plus, it’s sturdy enough to pick up with your hands—no fork required.
Quick wins:
- Gluten-free without weird gums or mystery ingredients
- High protein and fiber, so you actually feel full
- Fast to make with pantry staples
- Budget-friendly compared to fancy gluten-free mixes
The Simple Ingredient List (No Fancy Stuff)
You can grab everything at a regular store. If you have chickpea flour and a pan, you’re basically there.
What you need for one 12-inch crust:
- 1 1/4 cups chickpea (garbanzo) flour
- 3/4 cup water (plus 1–2 tablespoons if needed)
- 2 tablespoons olive oil, divided
- 1/2 teaspoon baking powder
- 1/2 teaspoon salt
- 1/2 teaspoon garlic powder
- 1/2 teaspoon dried oregano
Optional Boosters
- 1 tablespoon nutritional yeast for cheesy vibes
- Pinch of red pepper flakes for heat
- 1 teaspoon apple cider vinegar for a slight tang and lift
How To Make Chickpea Pizza Crust That Actually Crisps
Yes, we’re baking it twice. No, it’s not hard. That double bake gives structure and crunch.
- Preheat and prep: Heat oven to 425°F (220°C). Line a baking sheet or pizza pan with parchment. Brush with 1 tablespoon olive oil.
- Make the batter: Whisk chickpea flour, baking powder, salt, garlic, and oregano. Add water, 1 tablespoon olive oil, and any boosters. Stir until smooth—like pancake batter. If it’s stiff, add water 1 tablespoon at a time.
- Spread it: Pour onto the parchment and spread to a 12-inch circle about 1/4-inch thick. Thinner equals crisper, FYI.
- Par-bake: Bake 12–14 minutes until the surface looks set and edges lightly golden.
- Flip for crisp: Slide the crust onto another sheet of parchment, flip carefully, and return to the pan. Bake 5–7 more minutes. This is where the magic crunch happens.
- Top and finish: Add sauce, cheese, and toppings. Bake 6–10 minutes until melty and bubbling. Let it rest 3 minutes before slicing.
Pro Tips For Texture
- Parchment or bust: Chickpea batter sticks like a stage-five clinger without it.
- Don’t overload toppings: Heavy toppings = soggy center. Keep it balanced.
- Hot oven only: High heat sets the crust fast and keeps it sturdy.
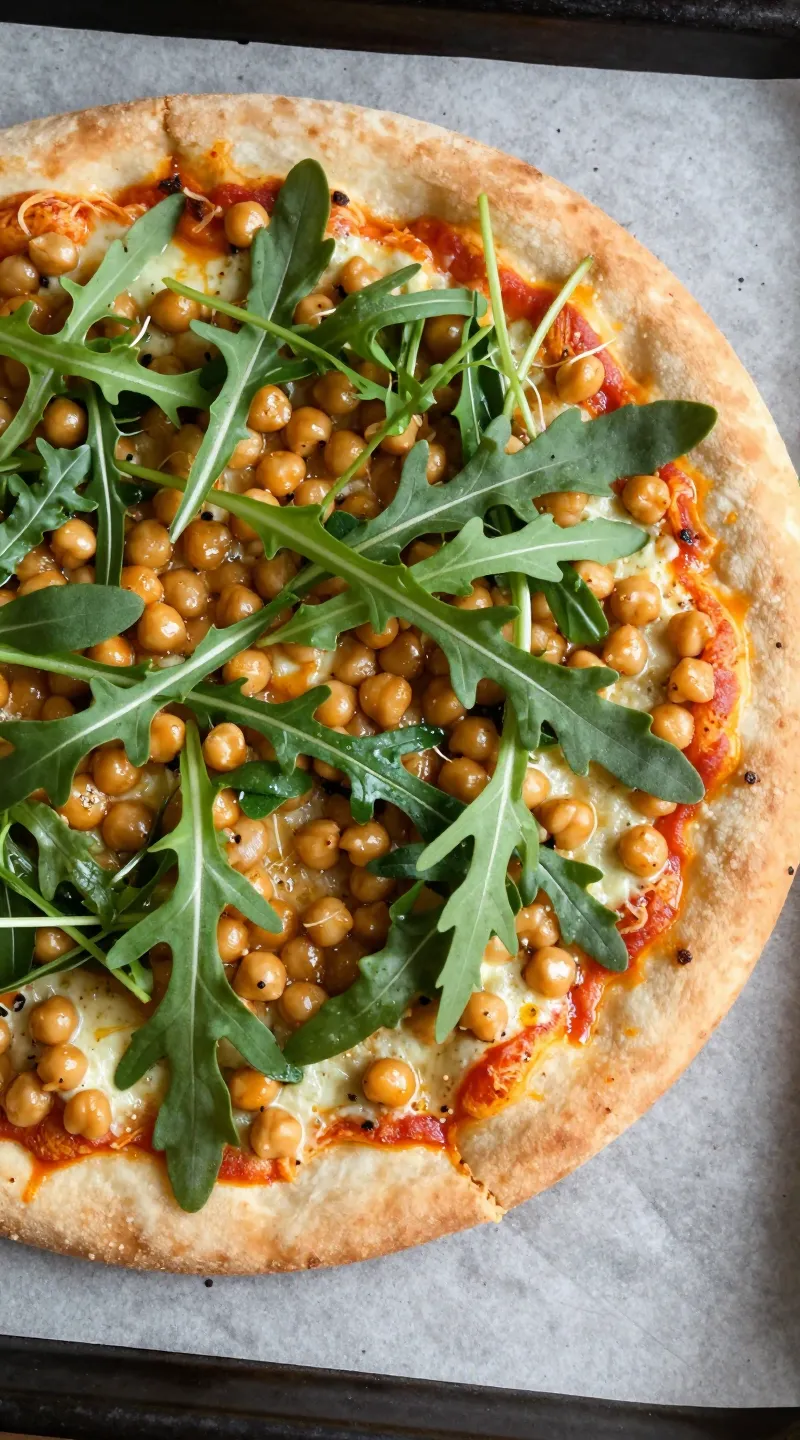
Toppings That Love Chickpeas
Chickpea’s subtly nutty base pairs with big flavors. Want ideas? Here’s a cheat sheet.
Protein-Packed Favorites
- Shredded rotisserie chicken + pesto + cherry tomatoes
- Turkey pepperoni + mozzarella + black olives
- Smoked salmon after baking + dill + lemon zest (no tomato sauce—use crème fraîche or olive oil)
Veg-Forward Combos
- Mushrooms + caramelized onions + goat cheese
- Roasted red peppers + artichokes + feta + arugula (added after baking)
- Butternut squash cubes + sage + ricotta
Dairy-Free Wins
- Tomato sauce + cashew mozzarella + basil
- Za’atar + olive oil + thinly sliced red onion + tahini drizzle post-bake
Nutrition Snapshot (aka Why Your Slice Fills You Up)
Rough estimate per plain crust (no toppings), using standard values: ~600–650 calories, ~28–32g protein, ~14–18g fiber, and healthy fats from olive oil. Add smart toppings and you’ve got a balanced meal that doesn’t crash your energy. IMO, it beats the usual white-flour situation by a mile.
Allergy & Diet Notes
- Gluten-free: Chickpea flour is naturally GF, but check for “certified gluten-free” if cross-contamination matters.
- Vegan-friendly: The crust contains no eggs or dairy. Top as you like.
- High-fiber: Great for satiety and blood sugar control.
Troubleshooting: Don’t Panic, Just Tweak

Stuff happens. Here’s how to fix it fast.
- Crust turned gummy? Bake longer during the par-bake. Thin it out slightly next time.
- Edges burned, center soft? Your oven runs hot. Lower to 400°F and add a few minutes.
- Stuck to the pan? Use fresh parchment and oil it. Chickpea batter needs both.
- Too fragile to lift? Let it cool 2–3 minutes after par-baking before flipping.
Make-Ahead, Freeze, Reheat: Because Future You Deserves Pizza
You can batch prep these crusts and have emergency pizza ready in minutes. Smart, right?
Make-Ahead
- Par-bake fully (both sides) and cool completely.
- Wrap tightly and refrigerate up to 4 days.
Freeze
- Par-baked crusts freeze like champs for up to 2 months.
- Stack with parchment between crusts so they don’t fuse into a carb brick.
Reheat
- Bake from chilled at 425°F for 4–6 minutes before adding toppings.
- From frozen, bake 6–8 minutes, then top and finish.
Flavor Upgrades You’ll Actually Taste
Little tweaks, big payoff.
- Garlic oil finish: Brush the crust lightly with garlic-infused olive oil before toppings.
- Sesame edge: Sprinkle sesame or everything seasoning on the rim pre-bake.
- Lemon zest: Add to the batter for a bright pop, especially with veggie pies.
- Smoked paprika: A half teaspoon in the batter adds warmth and color.
FAQ
Can I use canned chickpeas instead of chickpea flour?
Short answer: not for this recipe. Canned chickpeas create a wet, mushy blend better suited for socca or skillet flatbreads. Chickpea flour gives the structure and crisp edges you want for a true pizza crust.
How do I keep it from tasting “beany”?
Season the batter generously and bake it fully. Garlic, oregano, and a splash of vinegar cut any beany notes. Toppings with acid—like tomato sauce or a squeeze of lemon—also balance the flavor. After a proper bake, most people don’t notice any bean vibe at all.
Can I make it oil-free?
You can reduce the oil, but I wouldn’t skip it entirely. A small amount in the batter and on the parchment prevents sticking and improves texture. If you must go oil-free, use a silicone mat and expect a slightly drier, less flexible crust.
What’s the best pan to use?
A perforated pizza pan or baking steel gives peak crispiness. A regular baking sheet works great too—just don’t crowd the crust. Hot surface contact equals crunch, FYI.
Is this good for meal prep?
Absolutely. Par-bake several crusts on Sunday, stash them in the fridge or freezer, and you can throw a pizza together in under 15 minutes all week. Future you will send past you a thank-you note.
Can I make mini personal pizzas?
Yes, and they’re adorable. Spoon small rounds of batter (4–6 inches) onto parchment and reduce the bake time by a few minutes. Kids, picky eaters, or toppings-divas will love customizing their own.
Final Slice
Chickpea pizza crust brings you gluten-free, high-protein satisfaction without complicating your life. It’s crispy outside, tender inside, and ridiculously easy to customize. Try it once and you’ll keep a bag of chickpea flour in your pantry forever, IMO. Now go preheat that oven and claim your slice.