Okay, imagine this: a dessert so decadent it practically begs to be eaten with a big glass of milk, but also sophisticated enough to impress at your next dinner party. Sounds like a dream, right? Well, meet your new obsession: Brownie Chocolate Chip Cookie Bars.
These bars are basically a mashup of two of the greatest desserts known to humankind—gooey chocolate brownies and chewy chocolate chip cookies. Yes, it’s as epic as it sounds. I’ve personally tested this recipe more times than I’d like to admit (don’t judge—I’m a professional taste tester), and trust me, it delivers on all fronts: fudgy, chewy, chocolate-loaded, and basically impossible to resist.
So, if you’re ready to take your dessert game to the next level, I’ve got you covered. Let’s talk about why these bars are the ultimate treat and how you can make them in your own kitchen without breaking a sweat.
Why Brownie Chocolate Chip Cookie Bars Are a Game-Changer
Before we jump into mixing and baking, let’s talk about why this dessert is so darn irresistible.
Double Dessert Delight
We all love chocolate chip cookies, right? And brownies? Well, this recipe combines the best of both worlds. You get the chewy, sweet goodness of a cookie on top, and a rich, fudgy brownie layer underneath. It’s like having your cake (or cookie) and eating your brownie too.
No Fuss, Maximum Flavor
Unlike some fancy desserts that require 37 steps and a degree in pastry arts, these bars are easy, quick, and insanely satisfying. Even if you’ve never baked before, you can pull these off—and they’ll look like you spent hours in the kitchen.
Perfect for Any Occasion
Birthday party? Check. Random Tuesday chocolate emergency? Also check. These bars are versatile enough to steal the show at any event.
Ingredients You’ll Need
Before we get into the baking madness, let’s go over the ingredients. I promise, no weird stuff here—just delicious, approachable, chocolatey goodness.
Brownie Layer
- ½ cup (113g) unsalted butter
- 1 cup (175g) semi-sweet chocolate chips or chopped chocolate
- ¾ cup (150g) granulated sugar
- ¼ cup (50g) brown sugar
- 2 large eggs
- 1 teaspoon vanilla extract
- ⅓ cup (40g) all-purpose flour
- ¼ cup (25g) unsweetened cocoa powder
- ¼ teaspoon salt
This layer is your chocolatey, fudgy base. The combination of butter, chocolate, and sugars creates that perfect gooey texture we’re all craving.
Cookie Layer
- ½ cup (113g) unsalted butter, softened
- ½ cup (100g) brown sugar
- ¼ cup (50g) granulated sugar
- 1 large egg
- 1 teaspoon vanilla extract
- 1 ½ cups (190g) all-purpose flour
- ½ teaspoon baking soda
- ¼ teaspoon salt
- 1 cup (175g) chocolate chips
This is your chewy chocolate chip cookie topping. The secret? Using more brown sugar than white sugar for that irresistible chewiness and adding a generous amount of chocolate chips because why not?
Step-By-Step Instructions
Now let’s get to the good stuff. If you follow these steps, I guarantee bars that will make you look like a dessert wizard.
Step 1: Prep Your Pan
Line a 9×13-inch baking pan with parchment paper and lightly grease it. This makes removing the bars super easy and keeps them intact.
Step 2: Make the Brownie Base
- Melt the butter and chocolate together in a heatproof bowl over a double boiler or in the microwave (30-second intervals).
- Stir until smooth and glossy.
- Mix in both sugars until fully combined.
- Add eggs and vanilla, whisking until smooth.
- Sift in the flour, cocoa powder, and salt. Gently fold until everything comes together.
Pro Tip: Don’t overmix the brownie batter! Overmixing develops gluten, which means cakier bars. We want fudgy, remember?
Step 3: Spread Brownie Batter
Pour the brownie mixture into the prepared pan and smooth it out evenly. This will be the chocolatey foundation of your masterpiece.
Step 4: Prepare the Cookie Layer
- In a separate bowl, cream together the softened butter and sugars until light and fluffy.
- Beat in the egg and vanilla extract.
- Mix in the flour, baking soda, and salt. Fold in the chocolate chips.
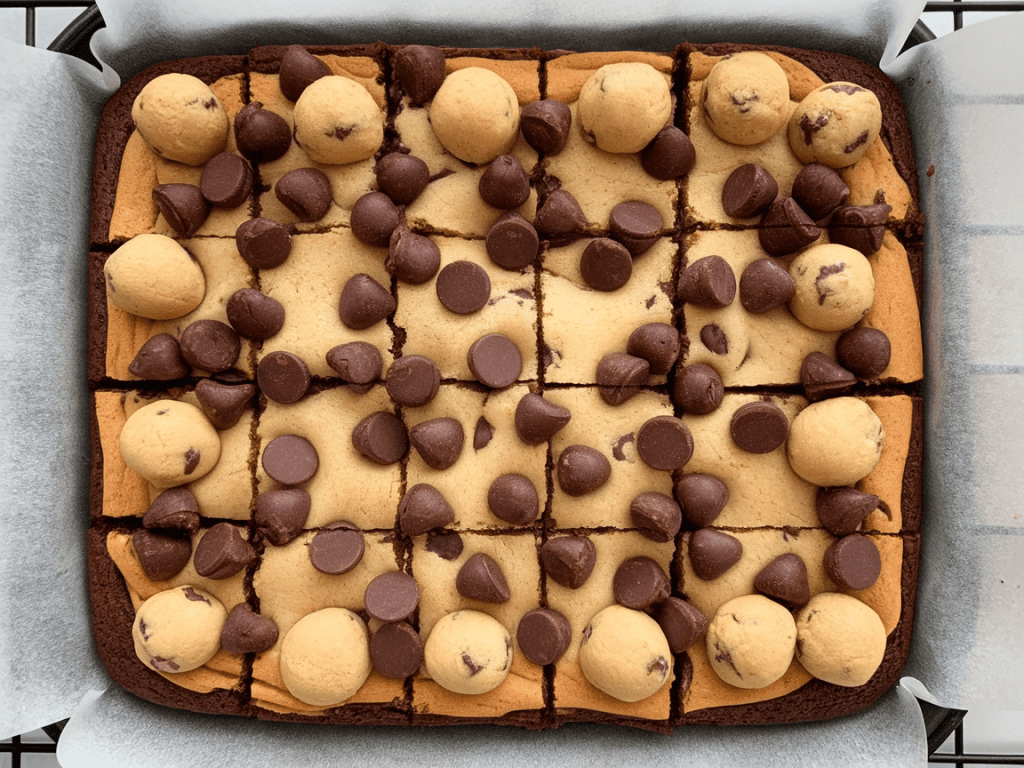
Step 5: Layer the Cookie Dough
Take spoonfuls of the cookie dough and scatter them evenly over the brownie layer. Don’t worry if it looks messy—the dough will spread and merge beautifully while baking.
Step 6: Bake
Bake at 350°F (175°C) for 30–35 minutes, or until the cookie topping is lightly golden and the brownies are just set. The center might look a little soft—that’s perfect.
FYI: If you poke the center and it jiggles slightly, don’t panic. This is what ultimate gooeyness looks like.
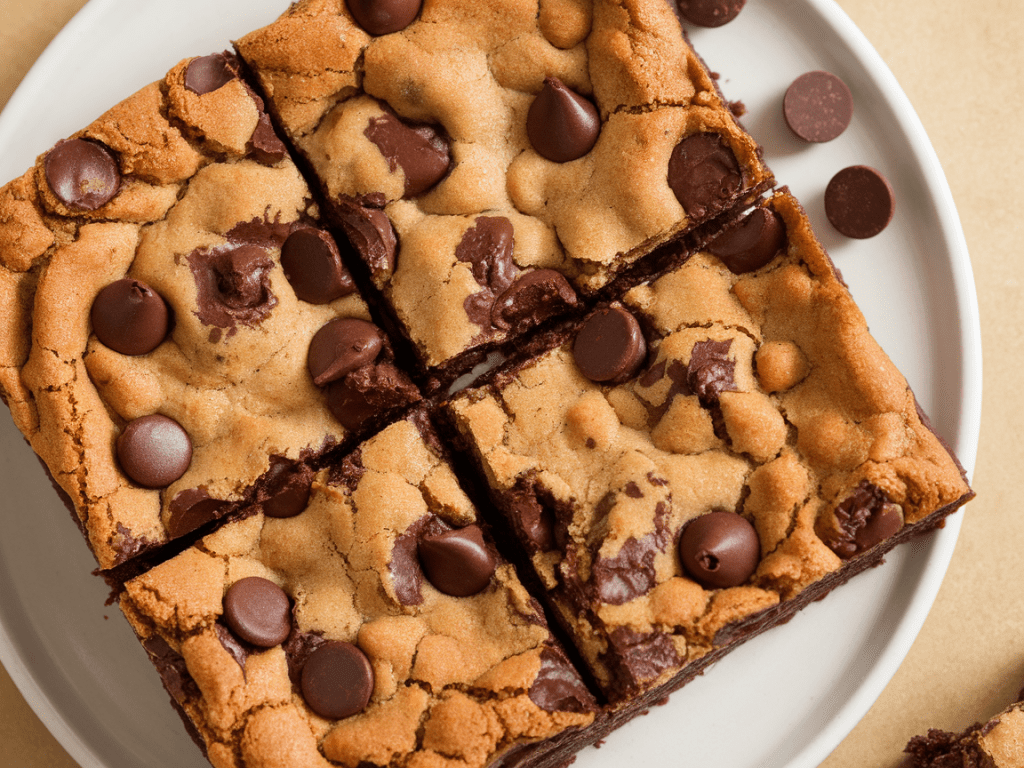
Step 7: Cool & Slice
Allow the bars to cool completely in the pan before slicing. This ensures clean squares and gooey perfection in every bite.
Tips for Ultimate Gooeyness
To make sure these bars turn out mind-blowingly good every time, follow these tips:
- Use quality chocolate: Cheap chocolate = disappointing bars. Don’t skimp.
- Underbake slightly: Brownies continue to set as they cool. Pull them too early and you’ll get fudgy, gooey perfection.
- Don’t overmix cookie dough: Keep it slightly chunky for a chewy texture.
- Line your pan with parchment: This helps with easy removal and prevents sticking.
Ever wondered why some people’s bars come out dry? They ignored these simple tricks. Don’t be that person.
Variations to Try
Once you master the classic version, you can get creative with flavors.
Nutty Bars
Add ½ cup chopped walnuts or pecans to the brownie or cookie layer for a crunchy surprise.
Peanut Butter Swirl
Drop spoonfuls of peanut butter on top of the cookie dough layer and swirl with a knife before baking. Your friends will think you spent hours on this.
Mint Chocolate
Add ½ teaspoon mint extract to the cookie dough for a refreshing twist. Perfect for holidays.
Espresso Infusion
Add a teaspoon of instant espresso powder to the brownie layer. Coffee and chocolate = next-level indulgence.
Common Mistakes to Avoid
Even experienced bakers make mistakes, but these are easy to sidestep.
- Overbaking: Remember, fudgy brownies continue to cook after coming out of the oven. Pull them out early.
- Uneven layers: Spread both layers as evenly as possible. Otherwise, you get cookie-heavy bites that throw off the balance.
- Skipping cooling time: Cutting warm bars is a disaster. Let them chill so you get clean, gooey squares.
Serving Suggestions
While these bars are incredible on their own, here are a few ways to make them even more irresistible:
- With a scoop of vanilla ice cream: Because chocolate + ice cream = perfection.
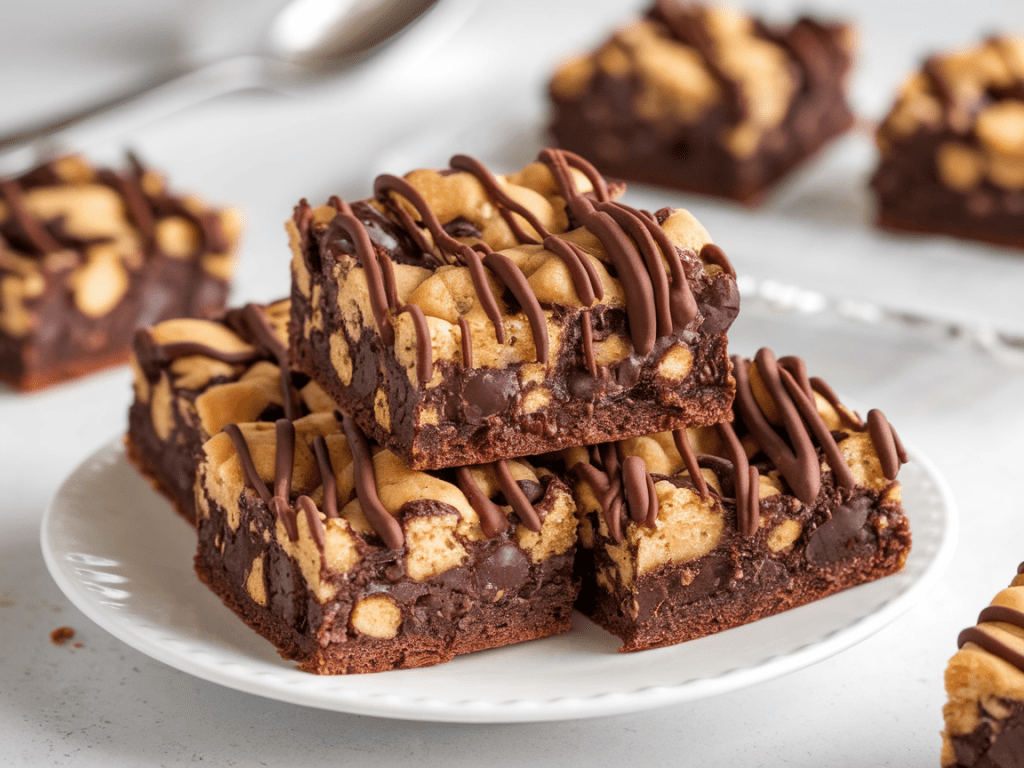
- Drizzled with caramel or chocolate sauce: Extra sweetness, extra wow.
- Dust with powdered sugar: Fancy touch for when you want to impress guests.
- Pair with coffee or milk: Classic combos never fail.
How to Store Brownie Chocolate Chip Cookie Bars
- Room Temperature: Store in an airtight container for 3–4 days. Bars get even gooier after a day.
- Refrigeration: Chill up to a week. Bars firm up slightly but stay chewy.
- Freezing: Wrap individual bars in plastic and freeze up to 2 months. Microwave for 10–15 seconds for a quick chocolate fix.
Why Everyone Will Love These Bars
Let’s be real—there’s almost nothing better than biting into a dessert that combines the chewiness of cookies with the richness of brownies. These bars are:
- Gooey – just the right level of fudgy indulgence.
- Chocolate-loaded – because, obviously, more chocolate = better chocolate.
- Easy to make – beginner-friendly but looks impressive.
- Shareable – perfect for parties, family, or selfishly devouring yourself.
IMO, these bars are the ultimate comfort food dessert. I’ve made them for countless friends and family gatherings, and they always disappear in minutes. People seriously fight over the last square, and yes, I take pride in my role as the instigator. 🙂
Final Thoughts
Brownie Chocolate Chip Cookie Bars aren’t just another dessert—they’re a statement. They scream indulgence, comfort, and celebration in every bite. With their fudgy brownie base and chewy chocolate chip cookie top, these bars are the ultimate treat for chocolate lovers, busy bakers, and anyone in need of a sweet pick-me-up.
If you’re looking for a dessert that’s easy, impressive, and downright addictive, this is it. Make a batch, share (or don’t, I won’t judge), and watch as these bars quickly become a favorite in your household.
Remember: life’s too short for dry desserts. Bake these bars, savor every bite, and maybe hide a piece for yourself. You deserve it.