If you’re craving fresh bread but don’t want a long, fussy process, this quick Italian bread hits the spot. It bakes up soft inside with a light, golden crust, and you can have it on the table in just over an hour. No advanced skills needed, no special equipment required.
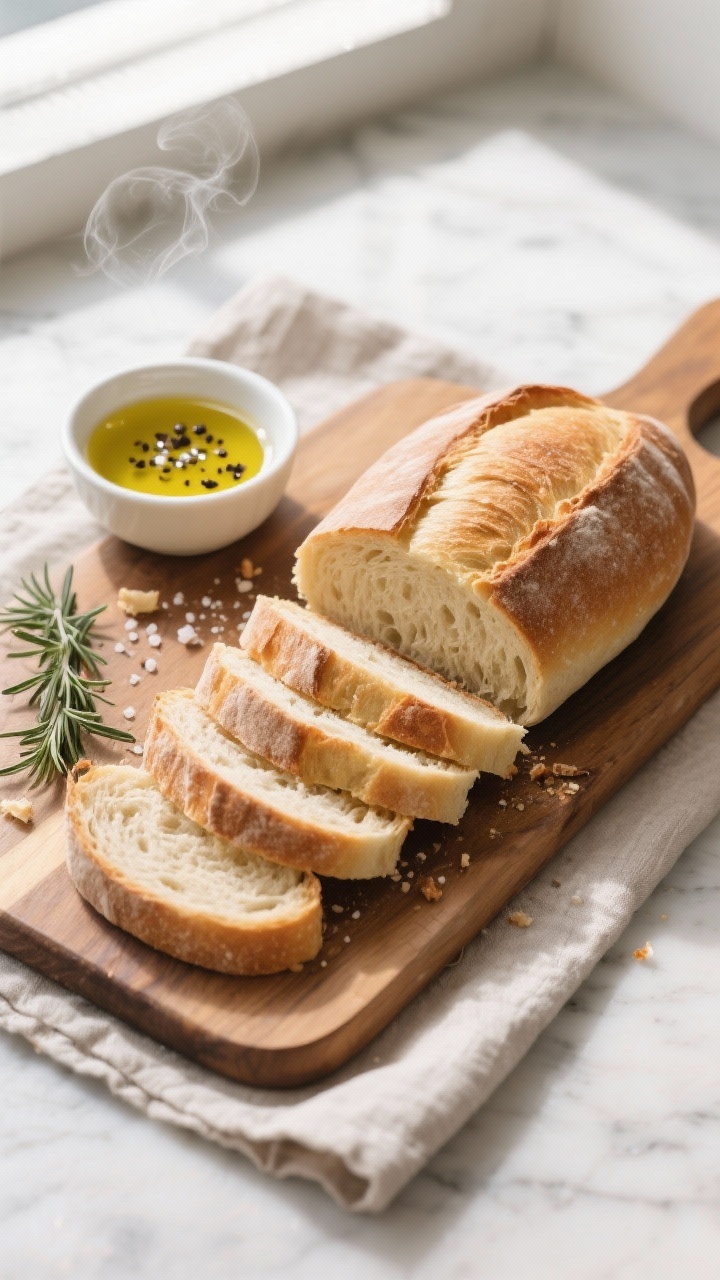
It’s the kind of loaf you tear into while it’s still warm, swipe through olive oil, or serve with a bowl of soup. Simple, comforting, and reliably good.
What Makes This Special
This recipe keeps the ingredient list short and the steps straightforward. It uses a slightly warmer rise and a bit of sugar to help the yeast work quickly, so you get bread fast without sacrificing texture.
The result is a loaf that’s tender but still sliceable, perfect for sandwiches or garlic bread. Plus, you can shape it into a classic oval, a long Italian-style baton, or even small rolls.
Because the dough is on the softer side, it stays moist and chewy. A quick steam trick in the oven gives you a gentle crust without needing a professional setup.
It’s the perfect balance of speed and quality.
Ingredients
- 3 cups (360 g) bread flour, plus more for dusting
- 1 cup (240 ml) warm water, about 105–110°F (40–43°C)
- 2 1/4 teaspoons (1 packet, 7 g) instant yeast or rapid-rise yeast
- 1 tablespoon sugar or honey
- 1 1/2 teaspoons fine sea salt
- 2 tablespoons olive oil, plus extra for brushing
- Optional: 1 egg white beaten with 1 tablespoon water for a shiny glaze
- Optional toppings: sesame seeds, coarse salt, dried Italian herbs, or grated Parmesan
How to Make It
- Activate the yeast (if using active dry): If you only have active dry yeast, mix the warm water with sugar and the yeast in a large bowl. Let it stand 5–7 minutes until foamy. If using instant yeast, you can skip this step and combine it directly with the flour.
- Make the dough: In a mixing bowl, add flour and salt.
Stir in instant yeast (if using) and then pour in the warm water, sugar (if not already used), and olive oil. Mix with a wooden spoon until a shaggy dough forms.
- Knead: Turn the dough onto a lightly floured surface. Knead for 5–7 minutes, adding only enough flour to prevent sticking.
You’re aiming for a smooth, slightly tacky dough that springs back when poked.
- First rise (quick): Shape the dough into a ball and place it in a lightly oiled bowl. Cover with a damp towel or plastic wrap. Let it rise in a warm spot for 30–40 minutes, until noticeably puffy and nearly doubled.
- Shape the loaf: Gently deflate the dough.
For a classic Italian loaf, pat it into a rectangle, then roll it up tightly from the long side, pinching the seam. Tuck the ends under for a neat look. Place on a parchment-lined baking sheet, seam-side down.
- Second rise: Lightly brush the loaf with olive oil.
Cover loosely and let rise for 20–25 minutes. It should puff up again and hold a light indentation when pressed.
- Preheat and steam setup: While the loaf rises, preheat your oven to 425°F (220°C). Place a metal pan on the bottom rack to heat up; you’ll add hot water to it for steam when baking.
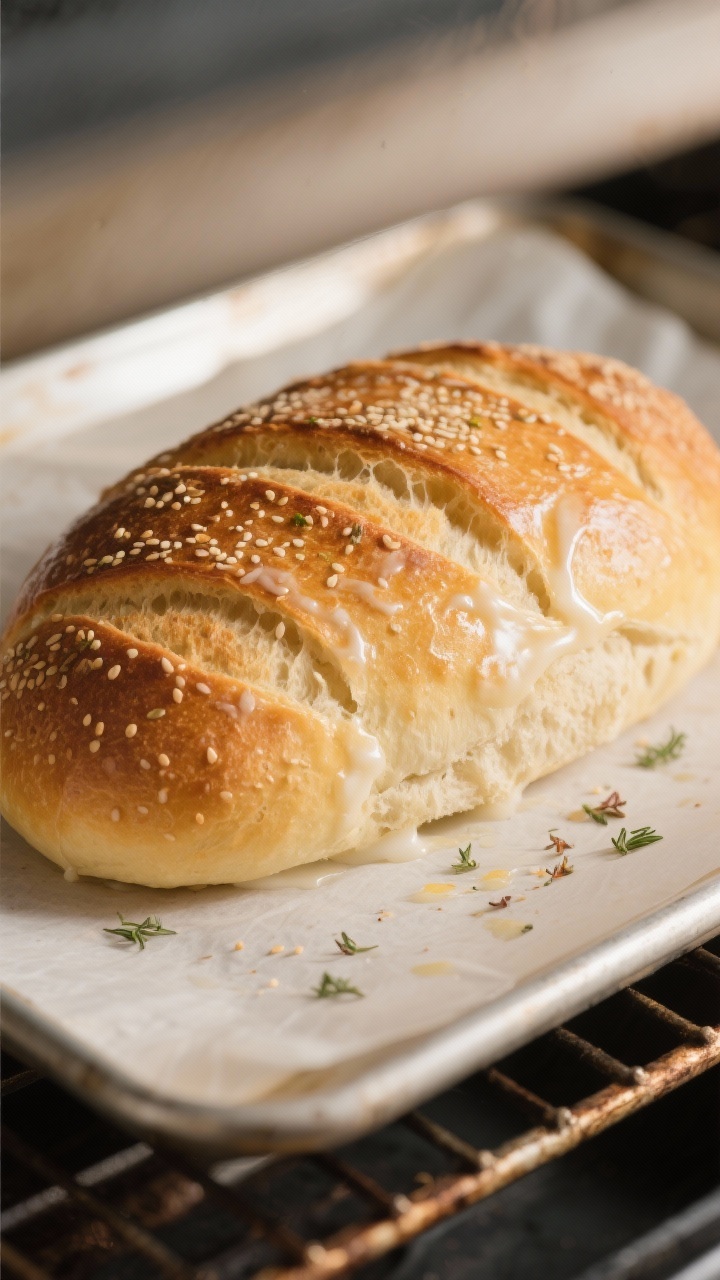
- Score and glaze: Using a sharp knife or bread lame, make 3–4 diagonal slashes across the top.
For a glossy finish, brush with egg white wash. For a softer finish, stick with olive oil. Sprinkle any toppings now.
- Bake with steam: Place the bread on the middle rack.
Carefully pour 1 cup of hot water into the preheated pan below to create steam and close the oven door quickly. Bake 20–25 minutes, until the loaf is golden and the internal temperature reaches about 200°F (93°C).
- Cool briefly and serve: Let the bread cool on a rack for 15–20 minutes. It will finish setting inside.
Slice and enjoy warm with butter or olive oil.
How to Store
- Room temperature: Keep the loaf in a paper bag or wrapped in a clean kitchen towel for up to 2 days. This keeps the crust from getting soggy while maintaining a soft interior.
- Freeze: Slice the bread, then wrap tightly in plastic and place in a freezer bag. Freeze for up to 2 months.
Toast slices straight from the freezer or thaw at room temperature.
- Revive: To refresh day-old bread, sprinkle the crust lightly with water and warm in a 325°F (165°C) oven for 8–10 minutes.
Why This is Good for You
This bread is made from simple, recognizable ingredients. There are no preservatives, and you control the salt and oil. The olive oil adds a touch of heart-healthy fat and helps create a tender crumb.
In moderation, fresh bread can be part of a balanced meal.
Pair it with lean protein, a salad, or a veggie-packed soup for steady energy and satiety. It’s also more satisfying than store-bought loaves thanks to its aroma and texture.
What Not to Do
- Don’t use hot water: Water hotter than 115°F (46°C) can kill yeast. Aim for warm, not hot.
- Don’t over-flour the dough: A slightly tacky dough bakes up softer.
Too much flour leads to a dense, dry loaf.
- Don’t skip the slashes: Scoring controls expansion. Without it, the bread may burst unevenly.
- Don’t cut immediately: Slicing too soon releases steam and makes the interior gummy. Give it at least 15 minutes.
- Don’t use a glass pan for steam: Only use a metal pan to avoid thermal shock and cracking.
Variations You Can Try
- Garlic and herb: Mix 1–2 teaspoons Italian seasoning and 2 cloves minced garlic into the dough.
Brush the top with garlic-infused olive oil.
- Sesame crust: Brush with egg white wash and coat generously with sesame seeds before baking for a fragrant, toasty finish.
- Rosemary and sea salt: Press chopped fresh rosemary onto the surface and sprinkle with flaky salt just before baking.
- Whole wheat blend: Swap 1 cup of the bread flour for whole wheat flour. Add 1–2 extra tablespoons of water if needed to keep the dough soft.
- Mini rolls: Divide into 8–10 pieces after the first rise. Shape into balls, let rise 20 minutes, and bake 12–15 minutes.
- Cheesy top: Sprinkle grated Parmesan or Pecorino in the last 5 minutes of baking for a savory crust.
FAQ
Can I use all-purpose flour instead of bread flour?
Yes.
All-purpose flour works fine. The bread may be slightly less chewy, but it will still rise well and taste great. If using all-purpose, knead a minute longer to build gluten.
What if I only have active dry yeast?
Bloom it in the warm water with sugar first until foamy, then proceed.
The timing stays roughly the same. If it doesn’t foam after 10 minutes, your yeast may be inactive and should be replaced.
Do I really need steam?
Steam isn’t mandatory, but it helps the loaf rise in the oven and creates a nicer crust. If you prefer to skip it, you can place a small pan of hot water in the oven as it preheats, or lightly mist the loaf with water just before baking.
How do I know it’s fully baked?
Look for a deep golden color and a hollow sound when you tap the bottom.
For accuracy, use a thermometer; the center should be about 200°F (93°C). Underbaked bread will feel squishy in the middle when pressed.
Can I make the dough ahead?
Yes. After the first rise, shape the loaf, cover, and refrigerate up to 12 hours.
Let it sit at room temperature for 30–45 minutes, score, and bake as directed.
How can I get a crisper crust?
Bake on a preheated baking stone or steel, use steam, and extend the bake by 2–3 minutes. Let the loaf cool completely on a rack to keep the crust from softening.
Is this bread good for sandwiches?
Absolutely. It slices cleanly once cooled and holds up well to fillings without crumbling.
For thinner slices, let it cool completely before cutting.
Final Thoughts
Fresh bread doesn’t have to be an all-day project. This quick Italian loaf brings you soft, warm slices with a gentle crust and classic flavor in a fraction of the time. Keep it simple for everyday meals, or dress it up with herbs and toppings when you want something special.
Once you make it a couple of times, it’ll become your go-to for weeknights and last-minute dinners alike.