Let’s be real—store-bought cream cheese is convenient, sure, but sometimes it feels a little… meh. You know that slightly processed taste that leaves you thinking, “I could do better”? Well, the good news is, you absolutely can make cream cheese at home, and it’s easier than you think. Fresh, tangy, and incredibly creamy, homemade cream cheese will make your bagels, crackers, and recipes taste next-level.
I first tried making it on a lazy Sunday when I had some leftover milk and wanted something creamy without buying a new tub from the store. Fast forward 30 minutes, and I had silky, rich cream cheese that made me feel like a full-on kitchen wizard. Ever wondered why homemade tastes so much better? Let me spill the secrets.
Why Make Cream Cheese at Home?
Freshness You Can Taste
One of the biggest perks of homemade cream cheese is freshness. Unlike store-bought versions, homemade cream cheese doesn’t contain stabilizers or preservatives. The flavor is clean, tangy, and bright, and you can adjust it to your liking.
- No preservatives: You know exactly what’s in it.
- Customizable: Want it tangier or richer? You control the taste.
- Fresh texture: Soft, creamy, and spreadable—no additives needed.
Ever bitten into a bagel with homemade cream cheese and thought, “Wow… this is why people make their own”? Yeah, that feeling.
Personal Touch: Why I Love DIY Cream Cheese
Honestly, once I made cream cheese at home, I never looked back. I could flavor it with garlic, chives, or even sweet stuff like honey and cinnamon. It made my morning toast feel gourmet and my snacks totally Instagram-worthy. IMO, it’s one of those kitchen tricks that makes you look fancy without trying too hard.
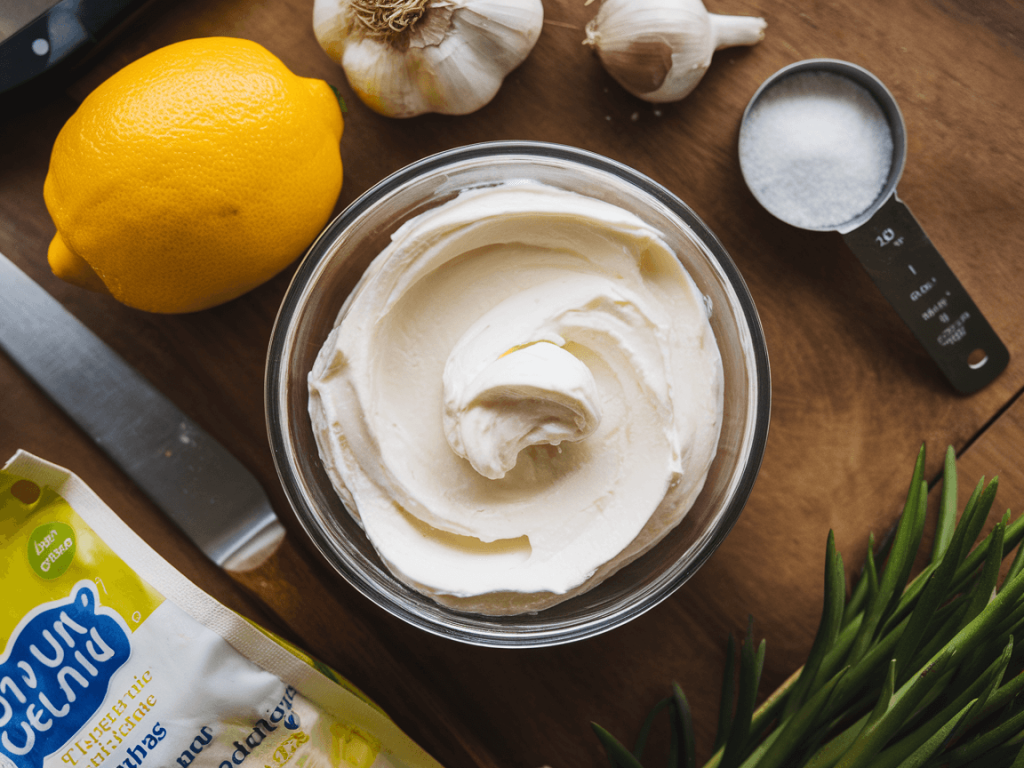
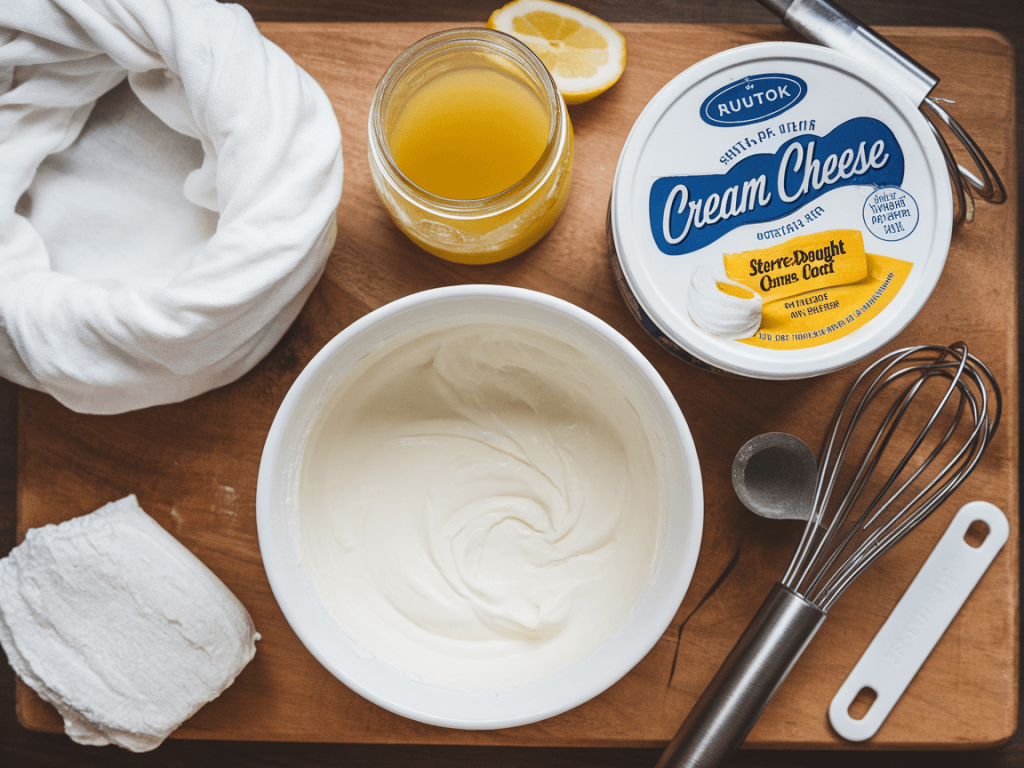
Ingredients You’ll Need
Here’s the beauty: you don’t need a million ingredients to make amazing cream cheese. You’ll need:
- 4 cups whole milk (full-fat works best for creaminess)
- 2 cups heavy cream
- 2 tablespoons lemon juice or white vinegar
- ½ teaspoon salt (adjust to taste)
Optional flavor boosters:
- Fresh herbs (chives, dill, thyme)
- Garlic powder or roasted garlic
- Honey or maple syrup for sweet versions
See? That’s it. You’re probably already thinking, “I have everything in my fridge!”
Step-by-Step Guide to Making Cream Cheese at Home
Step 1: Heat the Milk and Cream
- Pour milk and cream into a medium saucepan.
- Heat gently over medium heat, stirring occasionally.
- Stop when the mixture reaches about 180°F (82°C)—hot but not boiling.
FYI, heating slowly ensures the cream cheese develops that silky texture. No rushing allowed here.
Step 2: Add the Acid
- Remove the pan from heat.
- Stir in lemon juice or vinegar slowly.
- Let the mixture sit for 5–10 minutes as curds form.
You’ll see the milk separate into curds and whey—that’s exactly what we want. Ever wondered why cream cheese is tangy? This is why.
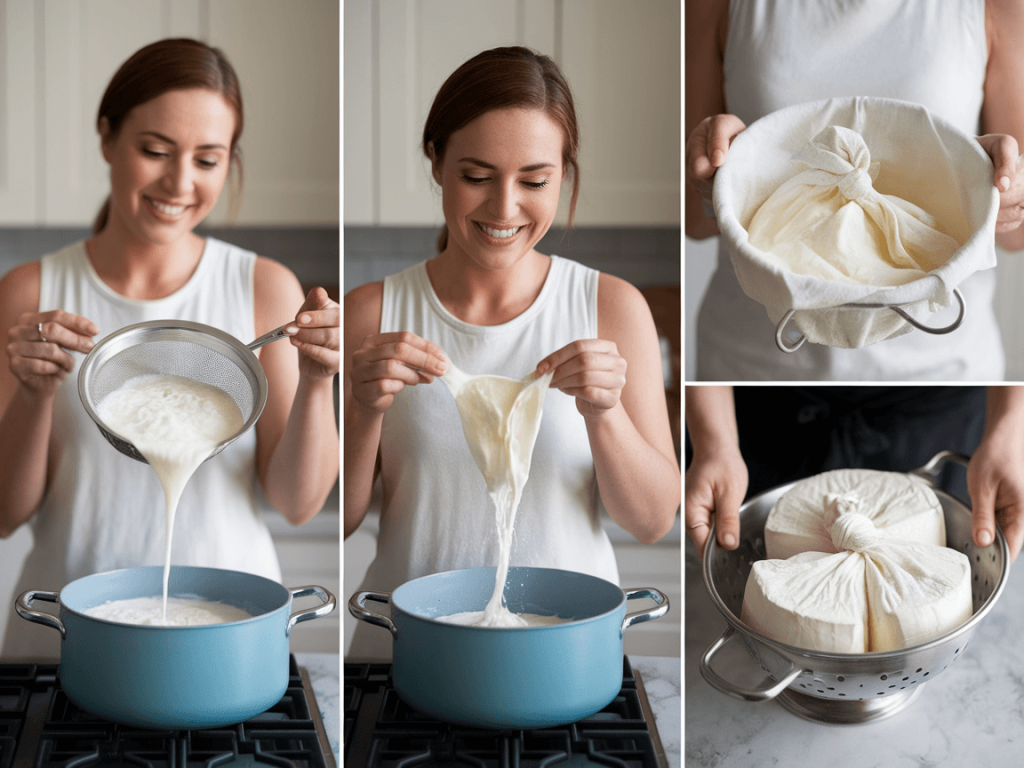
Step 3: Strain the Curds
- Line a colander with cheesecloth or a clean kitchen towel.
- Pour the curds into the colander, letting the whey drain into a bowl.
- Gather the cheesecloth and gently squeeze out excess liquid.
Pro tip: Don’t squeeze too hard or your cream cheese will turn crumbly instead of smooth.
Step 4: Blend Until Smooth
- Transfer the curds to a food processor or blender.
- Add ½ teaspoon salt and blend until creamy and smooth.
- Taste and adjust seasoning—this is your moment to shine.
Ever wondered why store-bought cream cheese is always perfectly smooth? Blending is key. You can even add herbs, garlic, or honey here for custom flavors.
Step 5: Chill and Store
- Transfer the cream cheese to an airtight container.
- Chill in the fridge for at least 2 hours before serving.
Chilling helps the flavors meld and the texture firm up. Homemade cream cheese lasts about 1–2 weeks in the fridge, but I doubt it’ll stick around that long. 😏
Flavor Variations for Homemade Cream Cheese
1. Savory Herb Cream Cheese
- Add chives, parsley, or dill during blending.
- Optional: sprinkle with garlic powder.
Perfect for bagels, sandwiches, or crackers. Guests will be impressed without knowing how easy it was.
2. Sweet Honey Cinnamon Cream Cheese
- Blend in 1–2 tablespoons honey and a pinch of cinnamon.
- Optional: swirl in some fruit preserves.
Amazing for morning toast, pancakes, or muffins. FYI, this one disappears fastest in my house.
3. Spicy Jalapeño Cream Cheese
- Mix in finely chopped jalapeños and a pinch of smoked paprika.
- Great for bagels, savory pastries, or as a dip.
Ever wondered how to make snacks exciting? This is it. Spicy, tangy, creamy… instant flavor bomb.
Tips for Perfect Homemade Cream Cheese
- Use full-fat dairy: Makes cream cheese richer and creamier.
- Heat slowly: High heat = rubbery texture.
- Choose fresh acids: Lemon juice or vinegar works best for flavor.
- Don’t over-blend: Just until smooth; over-processing can warm the cheese and change texture.
- Store properly: Airtight containers in the fridge keep it fresh longer.
Even if you’re a beginner, these tips guarantee creamy, fresh, and delicious results every time.
Common Mistakes and How to Avoid Them
- Curds too dry: Don’t squeeze out all the whey. Leave a little for creaminess.
- Too tangy: Use slightly less lemon juice/vinegar next time.
- Lumpy texture: Blend gently until smooth.
- Overheating milk: Keep below boiling to prevent graininess.
Ever tried making cheese and ended up with a sad, crumbly mess? Following these steps avoids all that.
How to Use Homemade Cream Cheese
- Bagels and toast: Classic and obvious, but oh-so-good.
- Sandwiches and wraps: Creamy layer for meats or veggies.
- Baked goods: Cheesecakes, muffins, or frosting.
- Dips: Mix with herbs or spices for a crowd-pleasing appetizer.
Honestly, the possibilities are endless. Homemade cream cheese makes any dish taste elevated.
Health Benefits of Homemade Cream Cheese
- Fewer additives: No stabilizers or preservatives.
- Protein-rich: Great for breakfast or snacks.
- Customizable fat content: Use cream or milk as desired.
- Digestive benefits: Fresh acids in homemade cheese can help with digestion.
So yes, it’s indulgent, but you can feel good about eating it.
Personal Story: How I Got Hooked
I first made cream cheese for a brunch with friends. I was nervous, thinking it would flop. Ten minutes in, the curds formed perfectly, I blended it, and served it with bagels. Everyone raved, and I felt like a kitchen wizard. Ever since, I’ve made it at least once a month—it’s just that good.
Storage and Shelf Life
- Refrigerate in an airtight container for 1–2 weeks.
- Freeze for up to 3 months (texture may slightly change, but still tasty).
- Always use a clean spoon when scooping to prevent contamination.
Pro tip: Portion it into smaller containers if you plan to use it for multiple dishes—it saves time and keeps it fresh.
Why Homemade Cream Cheese Beats Store-Bought
- Flavor: Tangy, fresh, and customizable.
- Texture: Creamy and smooth, without stabilizers.
- Cost-effective: Surprisingly affordable, especially if you already have milk and cream.
- Impressiveness: Feels fancy, tastes gourmet, but takes less than an hour.
IMO, once you try homemade, it’s hard to go back. It’s literally better in every way.
Conclusion
Making cream cheese at home isn’t just for cheese aficionados or kitchen pros—it’s for anyone who enjoys fresh, creamy, and delicious food. With just milk, cream, lemon juice, and salt, you can create a versatile ingredient that elevates breakfast, snacks, and recipes.
Next time you reach for store-bought cream cheese, consider giving DIY a try. You’ll enjoy:
- Fresh, tangy flavor
- Creamy texture
- Customizable variations
- A sense of kitchen pride
Honestly, once you taste homemade cream cheese, your bagels, muffins, and dips will never be the same. So grab your milk and cream, roll up your sleeves, and enjoy a simple, fresh, and delicious homemade creation. Your taste buds (and Instagram feed) will thank you. 😋