If you’re anything like me, the idea of crispy, golden pork ribs with juicy meat inside is pure heaven. Seriously, nothing beats biting into a rib that has a perfect crunch on the outside and melts in your mouth on the inside. Deep frying pork ribs might sound intimidating—maybe even slightly dangerous if you’ve never tried it—but trust me, it’s worth every second. Once you nail this, your ribs game will never be the same.
I remember the first time I tried deep frying ribs. I was skeptical—wouldn’t it be greasy? Would it explode in the oil? FYI, none of that happened, and I ended up with ribs so good that my friends wouldn’t stop asking for more. Today, I’ll guide you step by step through a method that’s foolproof, flavorful, and perfectly crispy every time.
Choosing the Right Ribs
Before you even think about oil, you need the right ribs. The type of ribs you pick can make or break your dish:
- Baby Back Ribs: Leaner and tender, cook faster, but slightly less forgiving if overcooked.
- Spare Ribs: Meatier, fattier, and ideal for deep frying. They stay juicy even with high heat.
- Country-Style Ribs: Thick, meaty, and perfect if you want a hearty, indulgent fry.
IMO, spare ribs or country-style ribs are your best friends here. They absorb seasoning well, handle hot oil like a champ, and are just plain satisfying.
Prepping Your Ribs
Preparation is everything. Don’t skip these steps unless you enjoy chewy, flavorless ribs:
- Trim excess fat: Leave some for flavor, but too much will cause oil splatter.
- Cut into manageable pieces: Around 2-3 inches works best for even frying.
- Pat dry: Moisture is the enemy of crispy ribs. Dry them thoroughly with paper towels.
- Season generously: Salt, pepper, garlic powder, paprika, or a custom rub—don’t be shy.
Here’s a dry rub I swear by:
- 2 tbsp brown sugar
- 1 tsp smoked paprika
- 1 tsp garlic powder
- 1/2 tsp cayenne pepper
- 1/2 tsp black pepper
- 1 tsp salt
Rub the spices all over the ribs and let them rest for at least 30 minutes. If you can, let them sit in the fridge for a few hours—it really amps up the flavor.
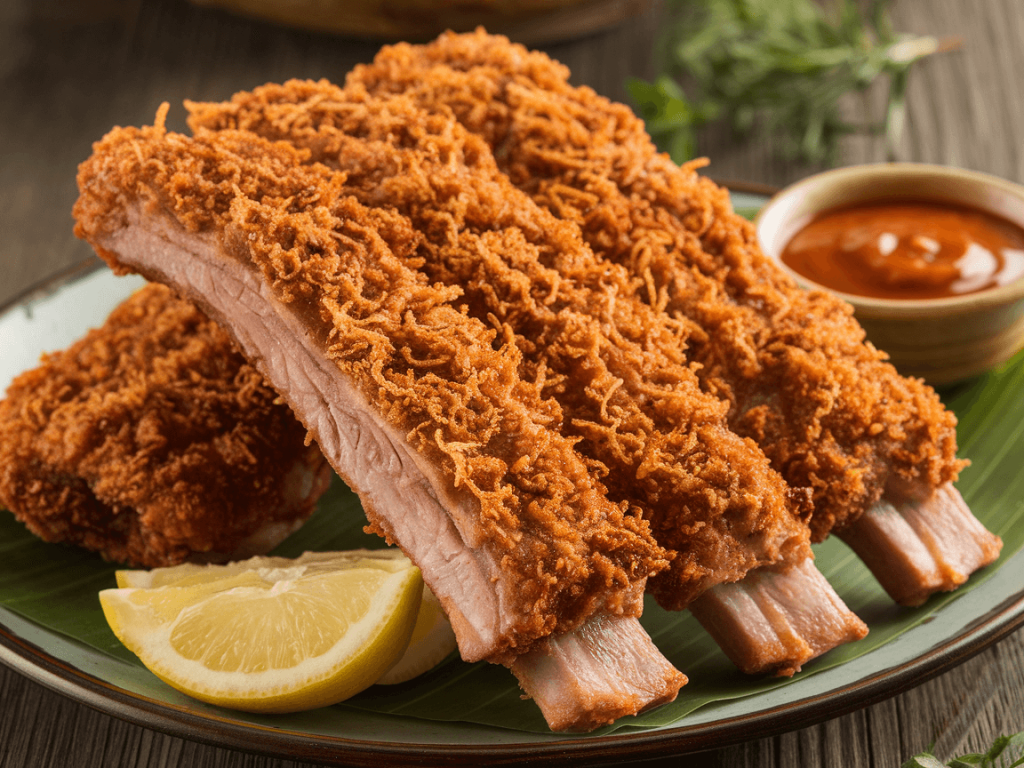
Breading for Extra Crunch
Now we’re talking. The breading is what gives deep-fried ribs that addictive crunch.
- Flour coating: Simple and classic. Mix flour with a bit of salt, pepper, and paprika.
- Cornstarch blend: For an extra crispy shell, combine flour and cornstarch 1:1.
- Buttermilk soak: Dip ribs in buttermilk before coating for a tender, flavorful crust.
FYI, I usually go buttermilk + flour/cornstarch blend. The ribs come out golden, crispy, and perfectly seasoned.
Heating the Oil Safely
This is where a lot of newbies freak out. Deep frying isn’t scary if you follow some basic rules:
- Use a deep, heavy pot: A Dutch oven or deep fryer works perfectly.
- Choose the right oil: Peanut, canola, or vegetable oil—high smoke point is key.
- Monitor temperature: 350–375°F is ideal. Too hot and the crust burns; too cool and the ribs get greasy.
Pro tip: never overcrowd the pot. Fry in batches. Your ribs need room to cook evenly, and this prevents oil temperature from dropping too much.
Frying the Ribs
Alright, moment of truth. Deep frying ribs is surprisingly quick:
- Lower carefully: Use tongs to place ribs in the hot oil gently.
- Fry in batches: Don’t be tempted to cram everything in.
- Cook until golden brown: Usually 8–12 minutes depending on size.
Ever wondered why some fried ribs end up soggy? Too low heat and overcrowding are usually the culprits. Keep the oil steady, and you’ll get that satisfying crunch.
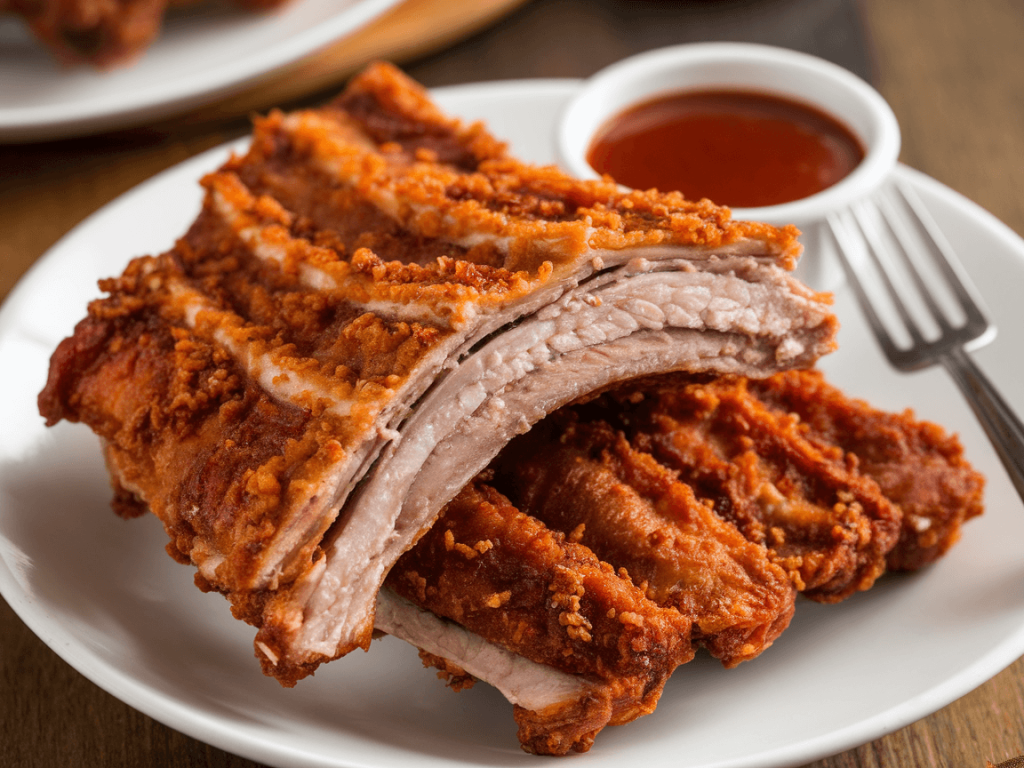
Post-Fry Perfection
Once your ribs are fried, it’s tempting to dive in immediately—but wait:
- Drain excess oil: Place ribs on a wire rack over a baking sheet to keep them crispy.
- Sprinkle finishing salt or rub: A little extra seasoning right after frying enhances flavor.
- Serve immediately: Crispy ribs lose their crunch if left too long.
If you want to get fancy, drizzle a little honey or brush your favorite BBQ sauce on the ribs for an irresistible glaze.
Flavor Variations
Deep fried ribs are versatile—don’t stick to the same flavor every time:
- Spicy Garlic: Garlic powder, cayenne, and smoked paprika
- Honey Glaze: Brush with honey and a pinch of chili for sweet and spicy
- Asian-Inspired: Soy sauce, ginger, garlic, and a sprinkle of sesame seeds after frying
- Smoky BBQ: Classic BBQ sauce brushed on for sticky, smoky goodness
IMO, the honey-chili glaze is my personal favorite. It gives that sweet kick and keeps the ribs extra juicy.
Common Mistakes to Avoid
Even seasoned cooks mess up fried ribs sometimes. Avoid these mistakes:
- Oil too hot or too cold: Ruins texture and can make ribs greasy or burnt.
- Skipping the dry rub: Flavor comes from proper seasoning, not just sauce.
- Overcrowding the fryer: Temperature drops, ribs become soggy.
- Not draining: Ribs will steam in their own oil if not on a rack.
Trust me, a little patience goes a long way. Your taste buds will thank you.
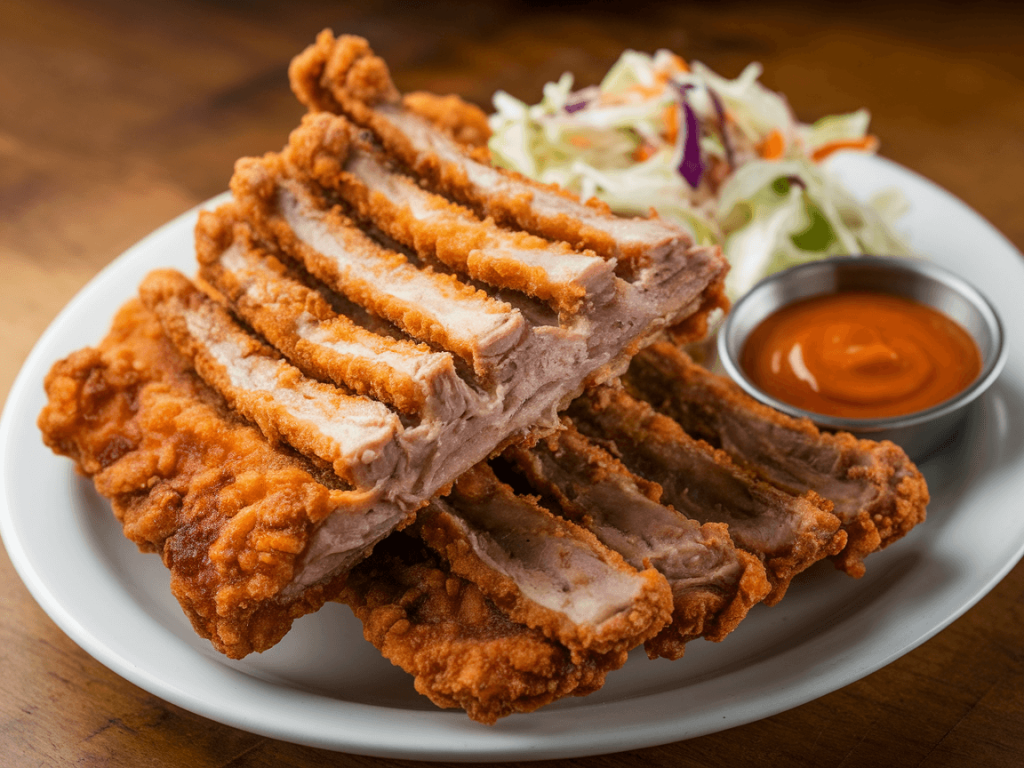
Serving Suggestions
Deep fried ribs are indulgent on their own, but pairing with the right sides makes them legendary:
- Coleslaw: Crunchy and refreshing contrast
- Fries or potato wedges: Classic comfort food combo
- Corn on the cob: Sweetness balances the savory ribs
- Pickles: Cuts through richness and adds zest
IMO, a little coleslaw and fries is all you really need. Keep it simple and let the ribs shine.
Storing and Reheating Leftovers
Leftover deep fried ribs? Rare, but it happens. Here’s how to handle it:
- Refrigerate: 3–4 days in an airtight container
- Reheat in oven: 350°F for 10–15 minutes, covered with foil to maintain moisture
- Avoid microwave: It kills the crispiness.
Bonus: leftover ribs make fantastic sandwiches. Layer with a little coleslaw, sauce, and pickles for next-day magic.
Tips for Perfect Deep Fried Ribs Every Time
- Dry thoroughly: Moisture is the enemy of crispiness
- Season generously: Don’t hold back on rubs or finishing salts
- Keep oil temperature steady: Use a thermometer for best results
- Fry in batches: No shortcuts, your ribs deserve space
Ever experimented with adding smoked paprika to the breading? It gives a subtle smoky flavor without a smoker. Mind-blowing.
Why Deep Fried Ribs Are Worth It
Deep frying ribs might sound indulgent (and it is), but the payoff is huge. Crispy exterior, juicy meat inside, and flavor-packed bites make it a dish you’ll crave over and over. The process might take a little patience, but the results are totally worth it.
IMO, the combination of crunchy crust, tender meat, and bold seasoning is unmatched. Once you try this method, you’ll wonder why you ever bothered with oven-baked or grilled ribs.
Quick Recap: Deep Fried Ribs Done Right
- Choose meaty ribs: Spare or country-style
- Prep properly: Trim, dry, cut, and rub
- Breading: Flour + cornstarch, optional buttermilk soak
- Oil setup: Heavy pot, high smoke point oil, 350–375°F
- Fry in batches: 8–12 minutes until golden brown
- Drain and season: Keep crispy, finish with salt or rub
- Serve with sides: Coleslaw, fries, corn, pickles
Follow these steps, and your deep fried pork ribs will be crispy, juicy, and bursting with flavor every time.
Final Thoughts
Deep fried ribs are an indulgence, yes, but one worth mastering. With a little prep, patience, and care with the oil, you can create ribs that are crispy, tender, and full of bold flavor. Friends, family, or just you—these ribs won’t last long once they hit the table.
Remember: dry, season, fry properly, and enjoy immediately. That’s the golden formula. Once you try this method, you’ll never look at ribs the same way again.
So grab your ribs, heat up that oil, and treat yourself to deep fried pork ribs that are crispy, juicy, and utterly irresistible. You’ve got this. 🙂