Ever stared at a menu and saw Crème Brûlée and thought, “Yeah, that looks fancy, but there’s no way I can make that at home without burning down the kitchen”? Same here—until I realized it’s actually super doable. Honestly, making this dessert at home is way less intimidating than it sounds, and the payoff? A creamy custard with that perfect caramelized sugar top that cracks just right when you tap it with a spoon. Total satisfaction.
I remember the first time I made it—I was nervous, sweating over the torch, thinking, “Do I even know what I’m doing?” Fast forward, and I now make it for parties, dinner guests, and sometimes just for me (don’t judge). By the end of this guide, you’ll be whipping up restaurant-quality Crème Brûlée like a pro, without the stress.
What Makes Crème Brûlée So Irresistible?
Let’s be real: what’s not to love about Crème Brûlée?
Smooth, Creamy Custard
The base of Crème Brûlée is a rich custard made from cream, sugar, egg yolks, and vanilla. It’s silky, dreamy, and melts in your mouth. Ever wondered why restaurant versions taste so indulgent? It’s the perfect balance of creaminess and sweetness.
Caramelized Sugar Top
The signature feature? That golden, crunchy layer of caramelized sugar. It cracks satisfyingly when you break it with your spoon, giving you a little reward before the creamy custard even hits your tongue.
Simple Ingredients, Fancy Dessert
Here’s the kicker: Crème Brûlée uses basic ingredients you likely already have: cream, eggs, sugar, and vanilla. The technique makes it fancy, not exotic ingredients. FYI, you can even jazz it up with flavors like coffee, chocolate, or citrus if you’re feeling creative.
Ingredients You’ll Need
Let’s get our shopping list sorted so you don’t have to run back and forth to the store mid-baking.
Basic Ingredients
- 2 cups heavy cream
- 5 large egg yolks
- ½ cup granulated sugar (plus extra for topping)
- 1 teaspoon pure vanilla extract
That’s it! Simple, right? I always recommend high-quality vanilla extract—trust me, it makes a huge difference in flavor.
Optional Flavor Boosters
- Citrus zest (lemon, orange)
- Espresso powder
- Chocolate or caramel swirls
I like adding a touch of orange zest sometimes—it adds a subtle brightness that contrasts beautifully with the rich custard.
Step-by-Step Guide to Perfect Crème Brûlée
Now, let’s get into the nitty-gritty. I’ll break it down like I’m right there in your kitchen, whispering secrets you won’t find in most cookbooks.
Step 1: Preheat and Prep
- Preheat your oven to 325°F (160°C).
- Arrange 6 ramekins in a deep baking pan.
Water bath, coming up! This keeps your custard smooth and crack-free.
Step 2: Heat the Cream
- Pour the cream into a saucepan and heat until just simmering.
- Remove from heat and let it cool slightly.
Pro tip: Don’t boil the cream—it can affect the texture. I’ve learned this the hard way 😅.
Step 3: Mix Egg Yolks and Sugar
- In a separate bowl, whisk egg yolks and sugar until pale and creamy.
- Gradually add the warm cream while whisking constantly.
This prevents your eggs from curdling. Ever made scrambled eggs by mistake in a custard? Yeah, me too—don’t let that happen here.
Step 4: Add Vanilla
- Stir in vanilla extract (or your flavoring of choice).
Step 5: Strain the Mixture
- Pour custard through a fine-mesh sieve into a large bowl.
- This ensures ultra-smooth texture, removing any bits of cooked egg.
Step 6: Pour Into Ramekins
- Divide the custard evenly among the prepared ramekins.
Step 7: Bake in a Water Bath
- Carefully pour hot water into the baking pan until it reaches halfway up the sides of the ramekins.
- Bake for 40–45 minutes until custard is set but still slightly jiggly in the center.
Ever wondered why restaurants serve it with that perfect wobble? That’s the key—don’t overbake.
Step 8: Cool and Chill
- Let ramekins cool at room temperature for 30 minutes.
- Cover and refrigerate at least 2 hours, preferably overnight.
Cold custard is essential before caramelizing sugar on top.
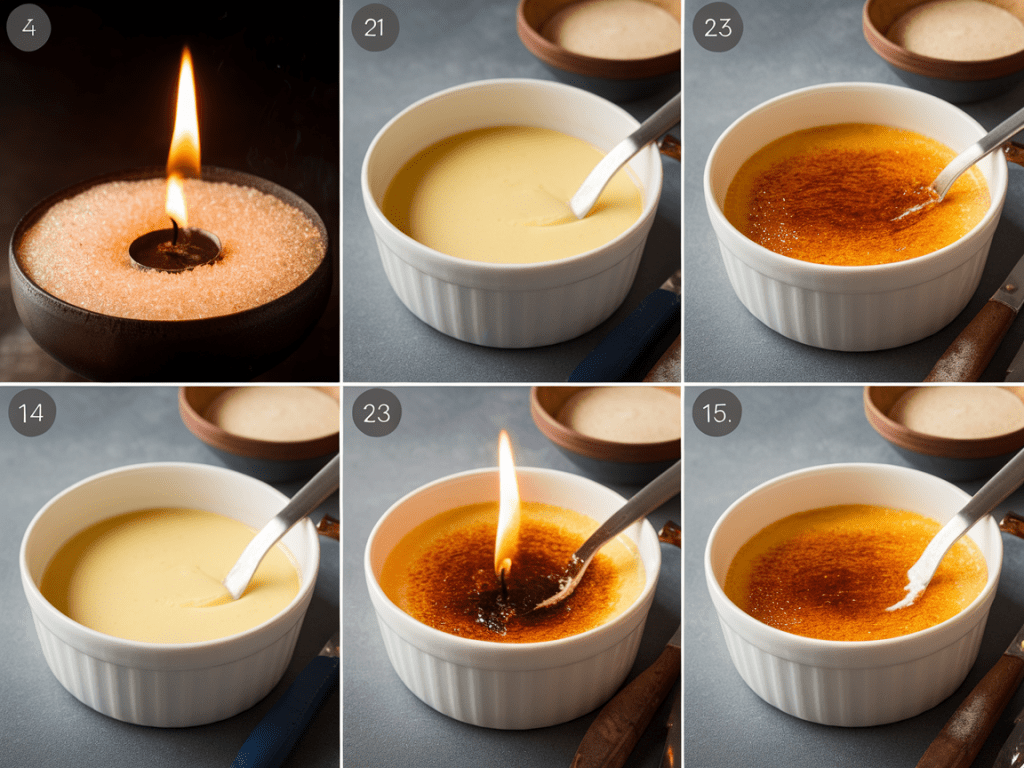
Caramelizing the Sugar: The Fun Part
Now comes the best part—crackable caramelized sugar.
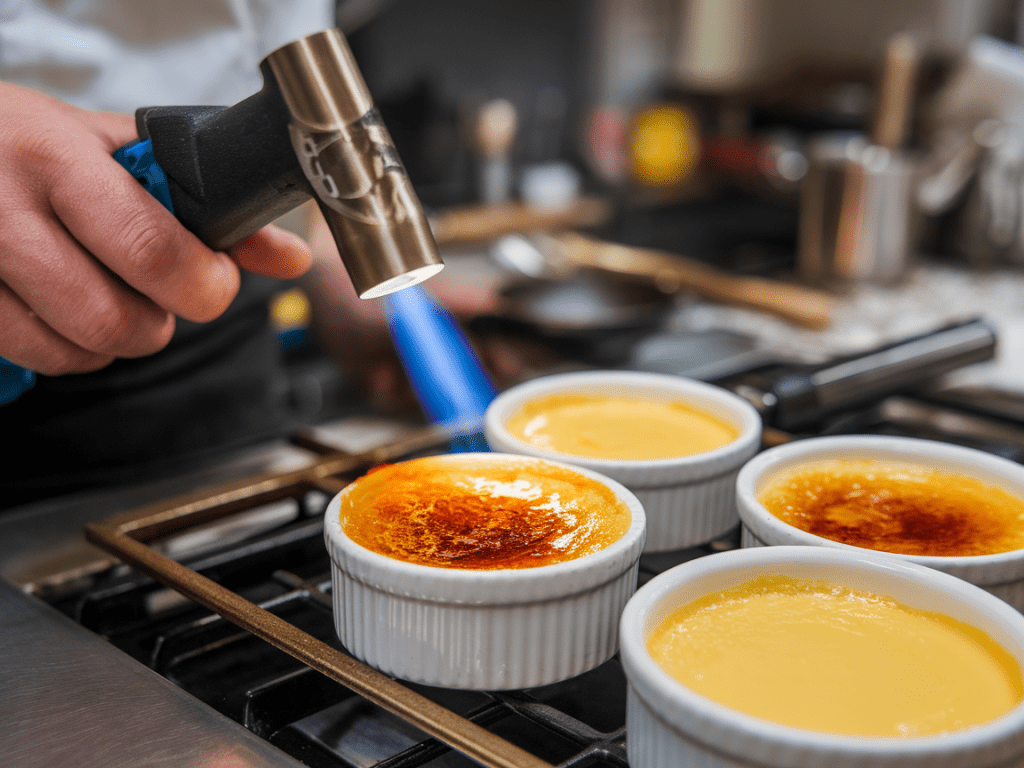
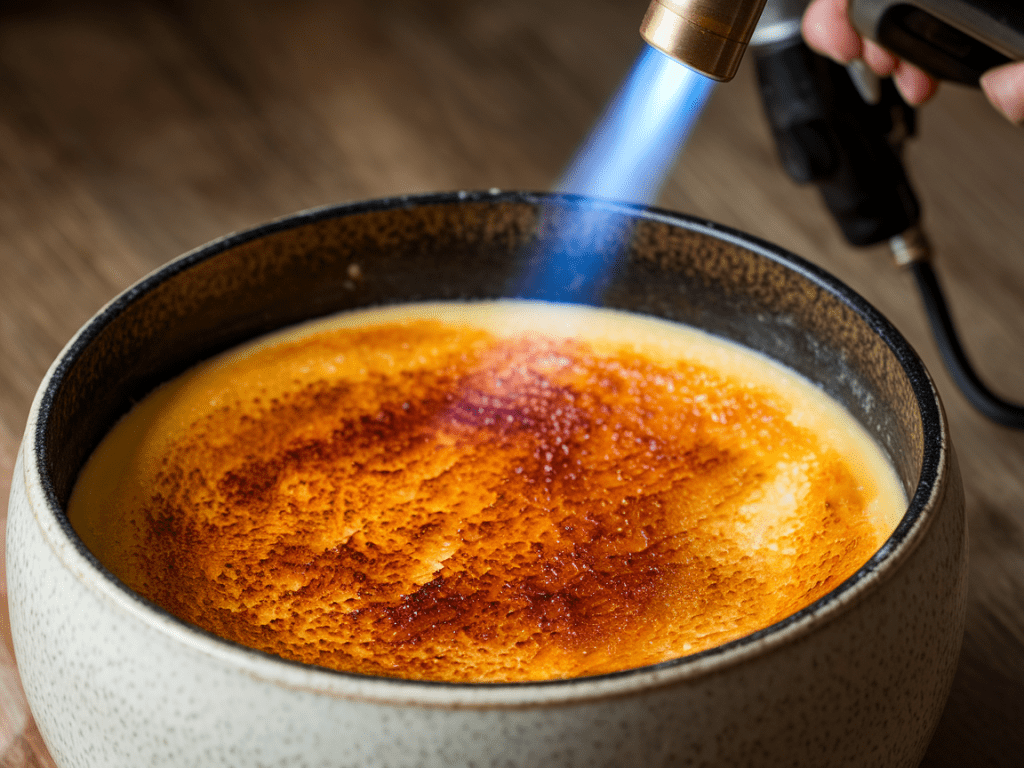
Using a Kitchen Torch
- Sprinkle 1-2 teaspoons granulated sugar evenly on top of each custard.
- Hold the torch 2–3 inches away and move in circular motions until sugar melts and turns golden brown.
Using a Broiler (No Torch?)
- Preheat your broiler.
- Sprinkle sugar and place ramekins under broiler 2–3 inches from heat.
- Watch carefully—sugar burns fast!
Pro Tip: Let the sugar cool for 1–2 minutes before digging in. Otherwise, it’ll stick to your spoon.
Tips for the Perfect Crème Brûlée
Even simple desserts have their tricks. Here’s what I’ve learned:
- Room temperature eggs prevent curdling.
- Strain custard for ultra-smooth texture.
- Don’t skip the water bath—it’s your secret weapon for creamy custard.
- Caramelize right before serving for that perfect crack.
- Experiment with flavors but don’t overdo it—the classic vanilla is perfection itself.
IMO, a little sea salt sprinkled on top of the caramelized sugar adds a gourmet touch that blows people away.
Flavor Variations You’ll Love
Want to step up your dessert game? Try these variations:
Chocolate Crème Brûlée
- Add 2 tablespoons cocoa powder or melted chocolate to cream before combining with eggs.
- Works best with dark chocolate—balances sweetness perfectly.
Coffee Crème Brûlée
- Dissolve 1 teaspoon instant espresso powder in the cream.
- Pairs beautifully with chocolate or caramel toppings.
Citrus Crème Brûlée
- Stir in zest of lemon, lime, or orange.
- Adds a fresh zing that contrasts the sweet custard.
Lavender or Vanilla Bean
- Infuse cream with lavender buds or vanilla bean before mixing.
- Creates a delicate, fragrant dessert.
FYI: Flavors should complement, not overpower, the creamy custard base.
Presentation Tips
Serving Crème Brûlée beautifully is easier than you think:
- Use small ramekins for single servings—they feel elegant.
- Garnish with fresh berries or mint leaves for color.
- Sprinkle a tiny pinch of sea salt on caramelized sugar for contrast.
- Serve on a decorative plate for that restaurant vibe.
I like making mini Crème Brûlées for parties—guests love the portion control and the fancy look.
Storing Your Crème Brûlée
Wondering how long you can keep it?
- Refrigerator: Up to 3 days in covered ramekins.
- Caramelize sugar right before serving: Keeps that signature crack intact.
- Avoid freezing—custard texture doesn’t survive it well.
Pro Tip: You can prep custard a day ahead, chill, and torch sugar just before serving. It’s a stress-free way to impress guests.
Common Mistakes to Avoid
Even seasoned bakers mess up sometimes. Avoid these rookie mistakes:
- Overbaking custard → rubbery texture.
- Skipping water bath → cracked custard.
- Caramelizing sugar too early → sticky, soft top.
- Using low-fat cream → compromises richness and mouthfeel.
Remember: precision and patience are your friends here.
Why Homemade Crème Brûlée Beats Store-Bought
Sure, you can grab a pre-made one from the grocery store, but homemade? Next level:
- Customizable flavors
- Freshly caramelized sugar top
- No weird additives
- Impresses guests
Honestly, nothing beats the satisfaction of cracking your own sugar top and enjoying that creamy custard underneath.
Final Thoughts
Making Crème Brûlée at home isn’t scary—it’s fun, rewarding, and a little show-off-worthy. The key points?
- Use high-quality ingredients
- Strain custard for smoothness
- Bake in a water bath
- Chill before caramelizing sugar
- Caramelize just before serving
Trust me, once you nail it, you’ll be the dessert hero at every dinner party. Plus, there’s something almost therapeutic about watching sugar melt and turn golden brown.
So, grab your ramekins, fire up that kitchen torch, and treat yourself to a creamy, perfectly caramelized dessert that tastes fancy but is totally doable at home.